
This repair was not completed at a Repair Café or Fixit Clinic, but it was kind of interesting so I’m writing a post about it.
Machining often involves arithmetic on very precise numbers. This is very tedious, so having a small calculator is very helpful. Being of a helpful nature, my school’s machine-shop has a few calculators, but nearly all of them are broken for some reason or another. This post is about fixing one of them.
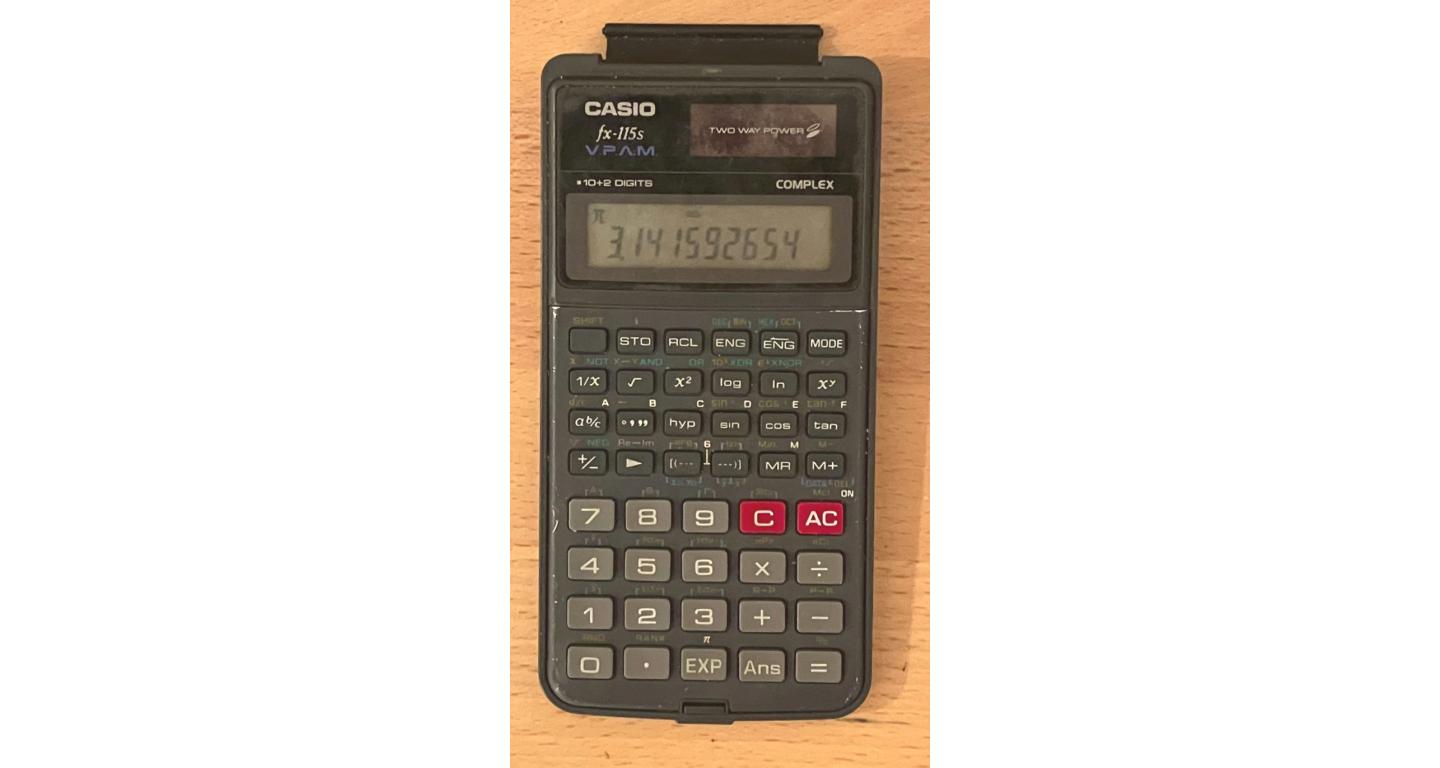
The calculator in question is a Casio FX-115S. It is a scientific calculator powered by either a solar panel or a button-cell battery. When found, it would not turn on at all, even when placed in direct light. Most solar calculators whose batteries have died will turn on in bright light, so clearly something else was wrong with this one.
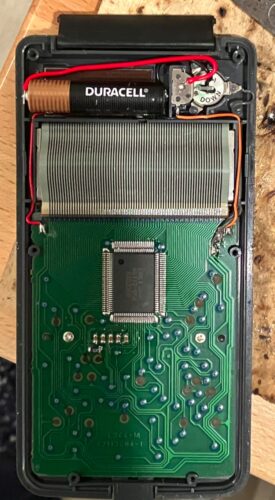
As expected, the battery was dead. Fortunately, it was 1.5 V, the exact voltage of common alkaline batteries. Even more fortunately, by snapping off some of the plastic ribs holding the solar panel was in place, I was able to create a hole barely large enough to fit a AAA battery. Wires soldered from the battery to the terminals served to create a secure electrical connection. This AAA battery, being considerably larger than the original button cell, should last for quite a while assuming it doesn’t leak; that said, the high temperatures from directly soldering wires onto the battery terminals might have damaged the seals in the battery.
Funnily, after installing the battery, the calculator worked perfectly, then turned off after a few minutes of inactivity. After that, it was impossible to turn on except by furiously mashing the “on” button. Also strangely, the LCD would often only be readable at a very oblique angle.
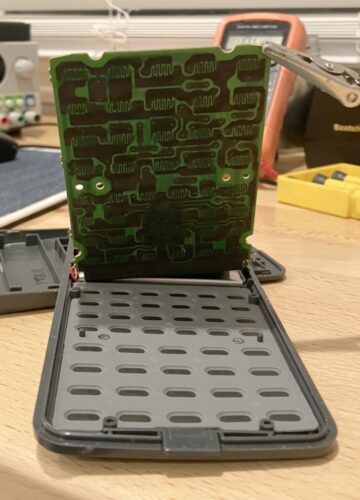
Like most calculators and devices with small keyboards, this one had a membrane keyboard. This is a keyboard consisting of a rubber sheet with little domes molded into it with some conductive material at the top. Pressing down a key compresses the dome and makes the conductive material short a set of contacts on a PCB below. This makes for an inexpensive and robust keyboard design since the only moving part is a solid rubber sheet.
I tried cleaning the contacts and conductive part of the “on” key with a wet paper towel, but this did nothing. To confirm that the contacts really worked, I shorted them with a piece of aluminium foil, which turned the calculator on. Then, for some more aggressive cleaning action I used isopropyl alcohol and lightly scraped the conductive dome with a spudger, which amazingly seemed restored the key back to normal.
After putting the whole thing back together the key was still a bit unreliable, though a sharp tap in the right spot was still able to press it. I’m not sure what caused it to fail in the first place, since the inside of the keyboard seemed very clean when I took it apart. My hope is that through repeated use, the key will “wear in” to some extent.
UPDATE 2025-04-30: It’s stopped working again. Oh well…