

I’d previously done some experiments trying to anodize aluminium with household chemicals, avoiding the need to buy sulfuric acid. The only process that succeeded was to make sulfuric acid by the electrolysis of Epsom salt (magnesium sulfate) in a partitioned electrochemical cell, and then use the sulfuric acid for anodization in the usual way. However, the electrolysis was very inefficient and slow, and is not really applicable for anodizing any appreciable quantity of parts. So when I was recently given the opportunity to anodize and dye some parts for my school’s robotics team, I abandoned my initial goal of strictly using household chemicals, while still trying to find a hobbyist-friendly process.
Introduction
The basic idea behind sulfuric acid anodization is to use an aluminium part as the anode for an electrolytic cell, generating oxygen at the surface, which reacts with the aluminium to form a very hard coating of aluminium oxide. The sulfuric acid dissolves small pores in the aluminium oxide, exposing fresh metal to be oxidized while leaving most of the coating in place. The pores also allow the aluminium to be dyed, creating a very durable coloring.
As a more hobbyist-friendly alternative to sulfuric acid, I decided to use sodium bisulfate, since it is safer and easier to obtain, and produces very similar results.
Basic Procedure
- Clean parts thoroughly
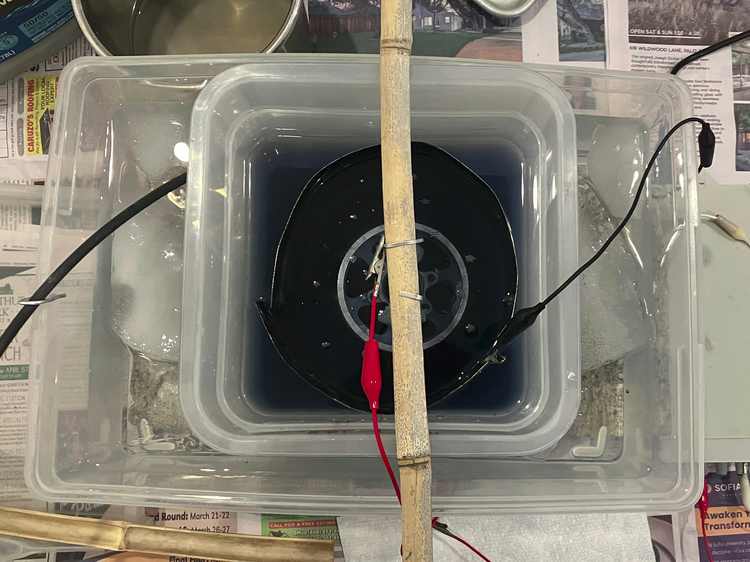
- Mount parts on wire, suspend in electrolyte
- Attach positive connection to part (anode) and negative connection to cathode
- Run specified current for specified time.
- Remove from anodization bath; rinse in baking soda solution to neutralize acid
- Rinse in water
- Immerse in heated clothing-dye solution for 15 minutes
- Rinse off excess dye
- Boil in water to seal
Safety
The chief danger of sodium bisulfate is getting it in your eyes; be sure to wear goggles. It is not terribly dangerous on the skin — a little splash isn’t cause for concern — though it can be irritating, and of course you should wear gloves if you’re working with it frequently. The solution is pretty corrosive, so avoid contact with reactive metals like aluminium or steel (stainless steel and copper are fine), and keep a solution of baking soda handy to neutralize any spills. Sodium bisulfate is not toxic on its own, and is in fact used as a food additive, but of course you shouldn’t eat/taste it on account of its low pH. Also, since anodization dissolves metal ions like aluminium, copper, etc. (which may have toxic effects) into the electrolyte, do not allow kitchenware to contact it.
The bubbling that occurs during anodization can throw up small drops of electrolyte, so it is preferable to anodize in a container with walls much higher (~100 mm) than the surface of the electrolyte. Irritating mist or fumes may be released, particularly when anodizing a large part and/or the solution is allowed to get very hot, so it’s better to anodize outdoors.
I used Rit clothing dye to dye parts. According to the manufacturer’s website, it is not food-safe, and they recommend washing any containers out with bleach if they must be re-used for food purposes.
TL;DR
- Wear goggles!!!!
- Wear gloves
- Don’t drink it
- Don’t use kitchenware
- Do it outside
Anodization
The Electrolyte
I followed the recommendation of most online guides and prepared a solution of 20% sodium bisulfate by weight, which corresponds to a concentration of about 2 M.
A lot of guides strongly recommend using distilled water for the electrolyte, presumably because any ions, particularly chloride, in tap water might interfere with the bath. However, I had success just using tap water. According to my city’s annual water quality report, chloride levels were measured at <3–18 ppm, far below the threshold of 80 ppm needed to cause corrosion (source). Furthermore, this article says that tap water is often used for the anodization baths in industrial settings.
It is typically recommended that some aluminium sulfate be added as a buffer. This supposedly to avoid “burning”, which occurs when excessive current density flows in some localized area, causing the electrolyte to heat up, which dissolves the oxide faster, decreasing resistance and increasing current even more. My guess is that excess current density also causes a localized decrease in pH, which also contributes to the positive-feedback effect — hence the buffer, to better regulate pH. (Many sources also recommend improving electrolyte agitation — which would also even out pH — to eliminate burning.) However, an excessively-high concentration of aluminium sulfate will decrease the solution’s conductivity, so it’s generally recommended (source) to keep the aluminium ion concentration between 5 and 15 g/L (0.19–0.56 M) in sulfuric acid baths.
ANYHOW, I didn’t add any extra aluminium sulfate at the start, and had fine results, possibly due to the low current densities/voltage demanded by my electrolyte’s low acidity.
Over time, the solution will decrease in acid concentration and increase in aluminium concentration. For reasons mysterious to me, my solution also turned blue, indicating the presence of copper ions; also, some copper got electroplated onto the cathode.
Current Density
The anodized coating grows in thickness practically proportionate with the charge per area passed through the part. Thus, current density and anodizing time are used determine the coating thickness: the “rule of 312” states that the anodizing coating will grow at a rate of 1 μm / (312 minutes × 1 A/m2). An overly-thin coating will not dye well; I found that a coating thickness of 20 μm worked pretty well. Another important factor is the coating’s porosity: an overly dense coating does not dye well, whereas an overly-porous one will be less durable. Low current density and high acid concentration make for a more porous coating.
Since sodium bisulfate is less reactive than sulfuric acid, it uses a somewhat lower current density. I had success with a density of around 90 A/m2 with freshly-prepared solution (commercial anodizing setups run at around 100–200 A/m2), though as the solution lost its acidity, parts began to lose porosity and take on less dye. Decreasing current density by 20–30% for later runs fixed this without the need to add more bisulfate.
Cathode
The negative electrode in the anodization cell is termed the “cathode”, and must be made of something which will not injure the solution — either an inert metal like stainless steel or titanium, or aluminium. An aluminium cathode is protected from corrosion during anodization through cathodic protection, but will slowly dissolve whenever a current is not running. Online guides specifically warn against a copper cathode, though when I tried one (made from a loop of copper wire) for anodizing small parts, it worked all right. Possibly the stronger anodizing solutions used in industry will dissolve a copper cathode, adding copper ions to the solution which may negatively affect the anodization.
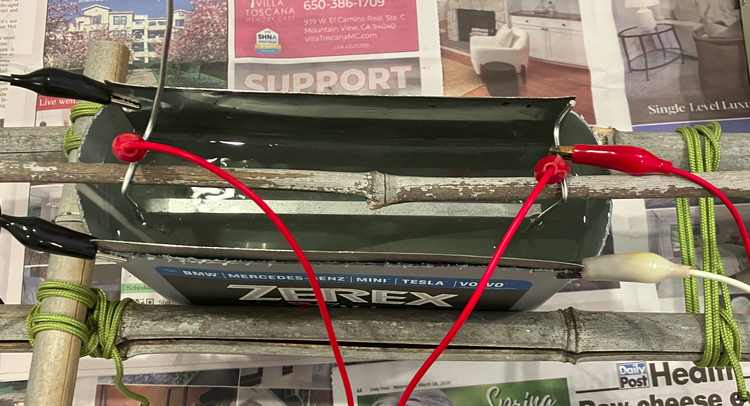
I used a pair of 316 stainless-steel sheets cut from a broken refrigerator’s door. They developed a black powdery coating during anodization — most likely some reduced metal or precipitated ionic compound. This coating also fizzed in the anodizing solution after current was turned off.
on cathode
Cleaning Parts
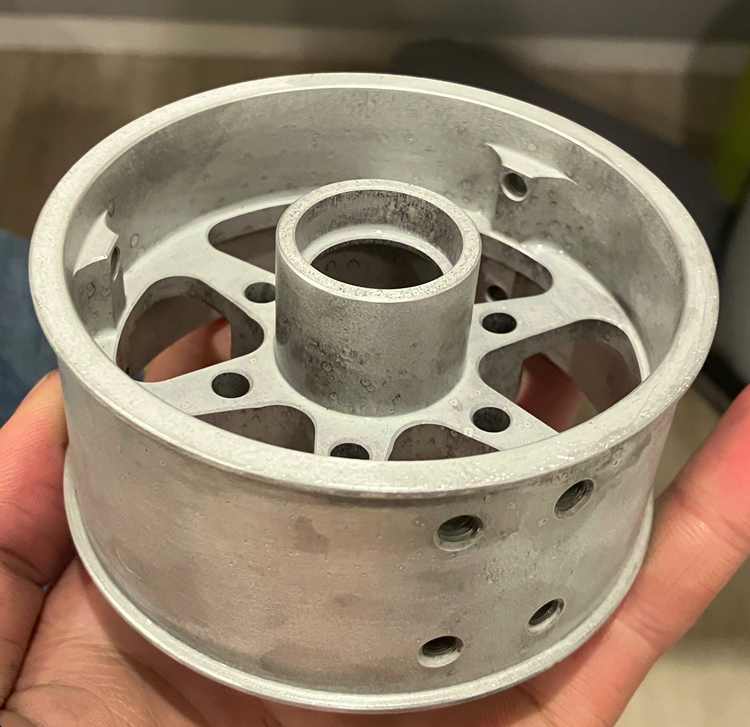
Most online guides say that parts must be excruciatingly clean before anodization, and recommend some combination of sanding, degreasing, etching with sodium hydroxide, and de-smutting to remove the residue from etching. I had success simply scrubbing all parts thoroughly with dish soap and stainless-steel wool. However, I did notice some fingerprint-marks on dyed parts, so be careful when handling parts before and after anodizing.
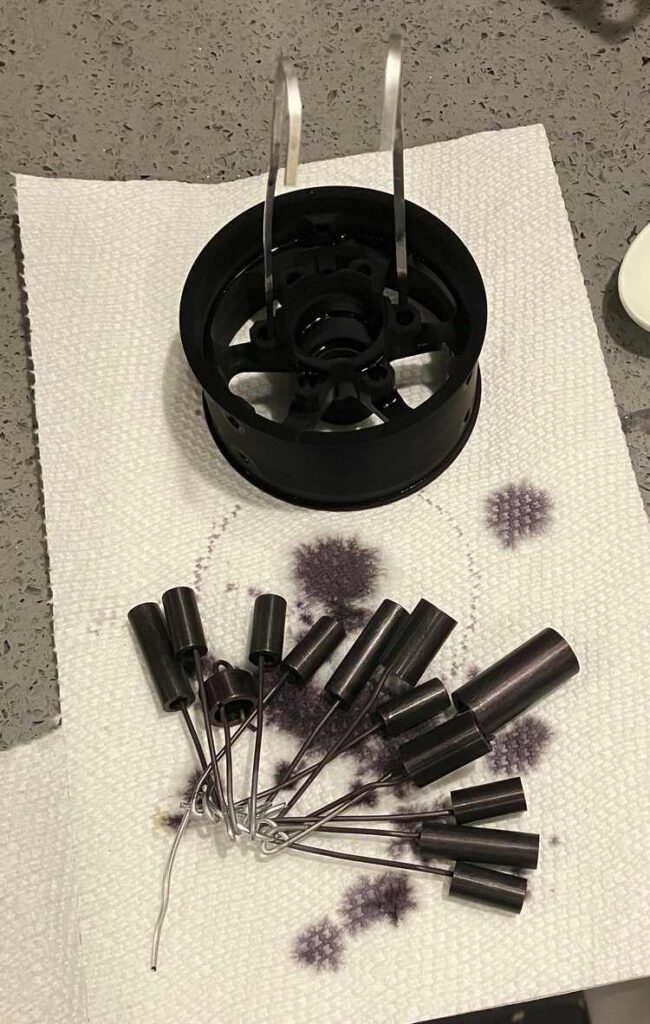
Mounting Parts
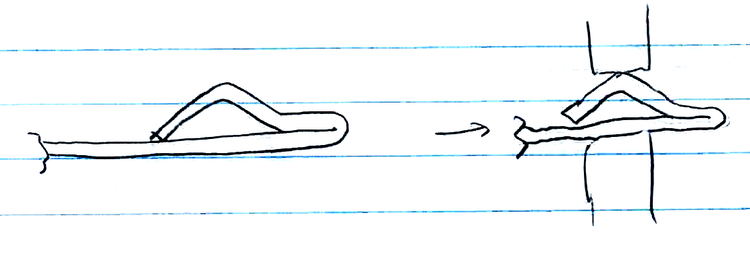
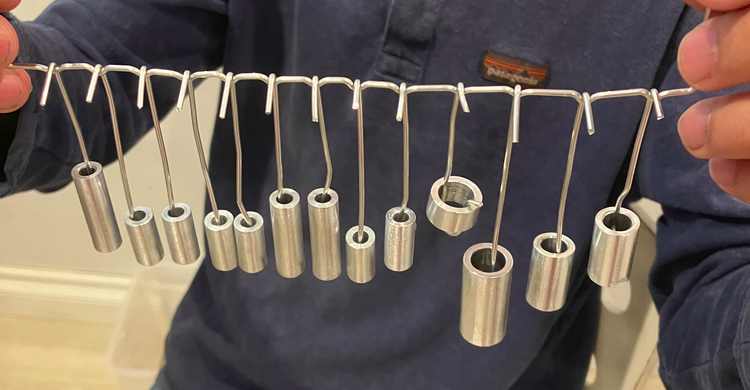
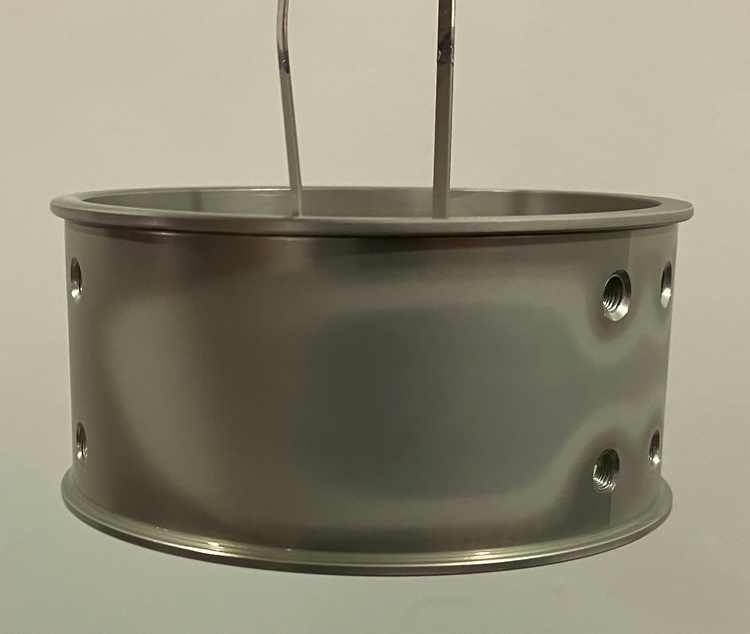
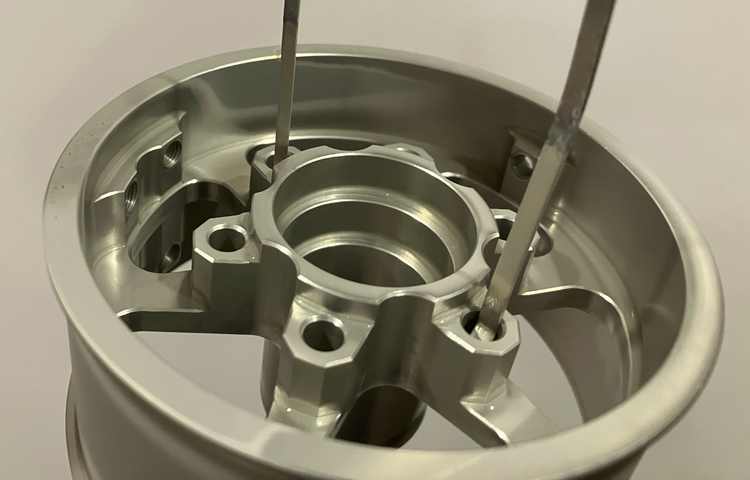
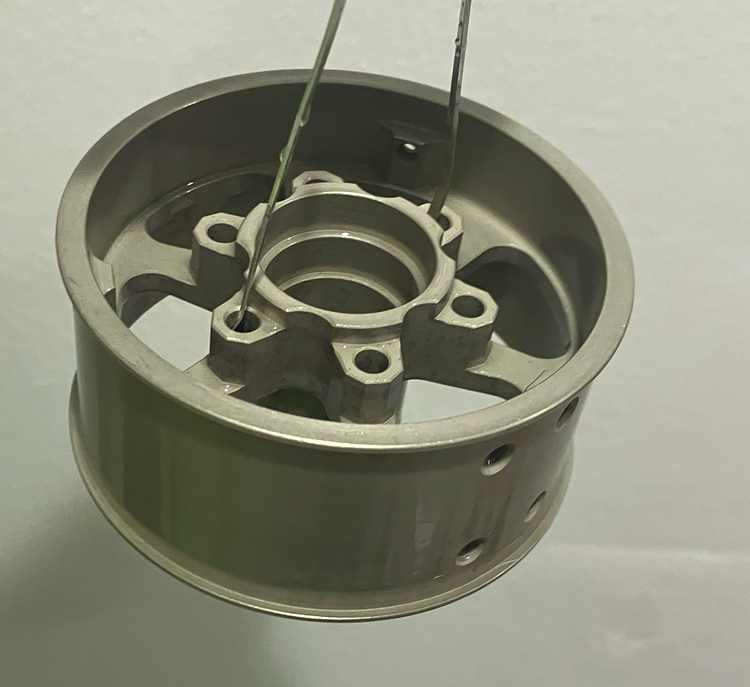
In industry, parts are mounted on a big rack, which uses spring-loaded pincers or clips to provide an electrical connection to the part. The rack is made of titanium for its chemical inertness, allowing it to be reused over and over without becoming corroded or anodized. For hobbyists it is more practical to use bits of aluminium wire, usually shoved into a hole or some other inconspicuous place. (Where the wire contacts the part will not be anodized.) Many online guides misleadingly suggest you need a very tight fit between the wire and the hole, and suggest bunching up the wire and then ramming it in with a hammer. I found that simply having some amount of spring pressure to keep the wire attached was sufficient.
The essential goal in this case is forming the wire into a shape that can deform to enter holes, while maintaining spring pressure. For this it is important to avoid very acute bend angles, since these are more likely to yield plastically instead of springing. I found that thin strips of 6061-T6 (sheared from a sheet) worked best due to their good elasticity, though 4043 welding filler wire also performed alright despite being much more plastic.
of the coolant-jug-with-its-top-cut-off, which would otherwise bulge out
Cooling
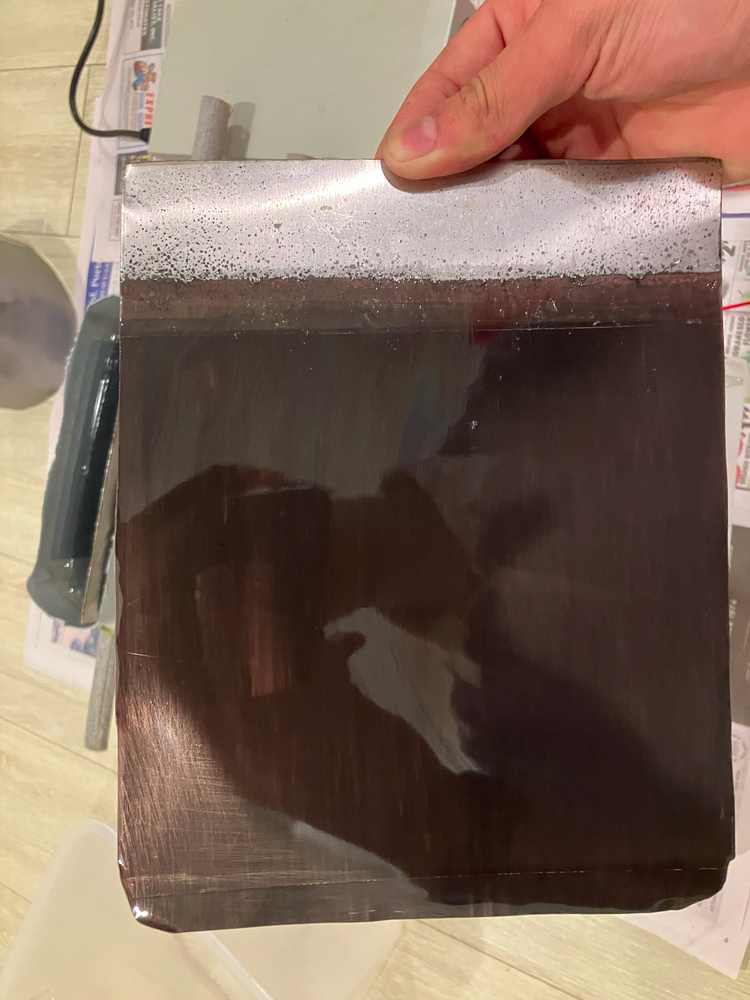
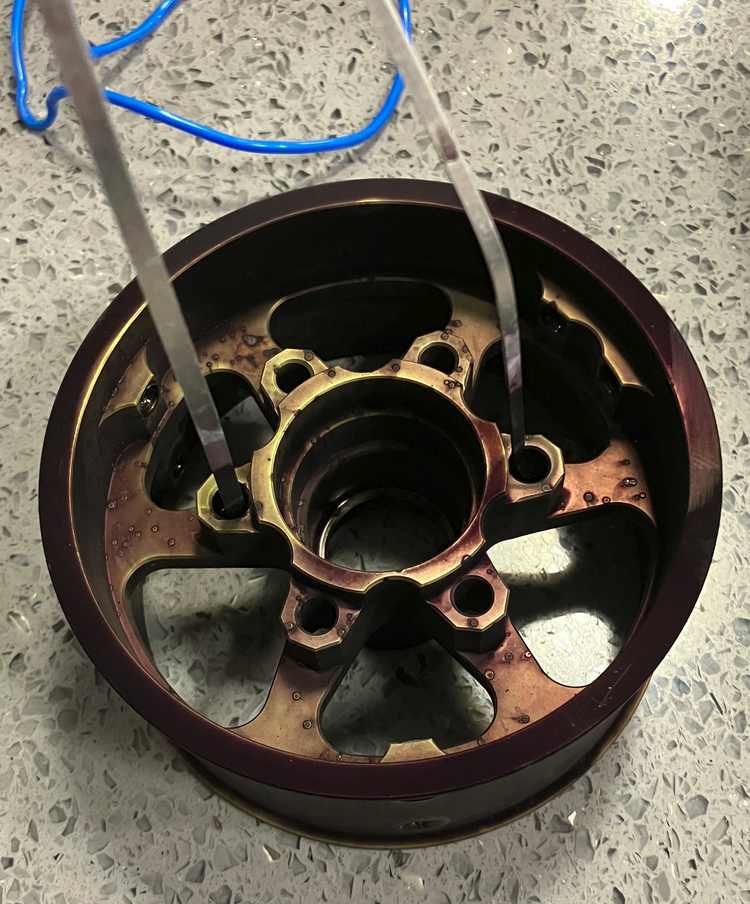
When I tried anodizing a part with a particularly large surface area, the high current (~4 A in a bath of 3 L) caused the bath to overheat, releasing visible amounts of steam during the process. Coming out of the anodization bath, the part had shiny areas where the oxide had been completely “burned” (i.e. dissolved) away by the hot electrolyte, while other portions of the oxide felt powdery and very porous. The dye was easily absorbed, but most of it washed out immediately when placed in the hot-water sealing bath.
To re-anodize the part, I first dissolved the failed coating in sodium hydroxide drain cleaner. I tried about a 3:1 dilution for about 20 minutes, which had very vigorous gas production, and dissolved some small pits into the aluminium’s surface. After scrubbing the part and further diluting the solution to about 20:1, I etched the part about 30 minutes longer, which was able to get most of the oxide off. I also found a Dremel wire-wheel and a piece of Scotch-Brite helpful in removing stubborn bits of coating.
On the second attempt, I put the polypropylene anodization container in tub of ice water, replenishing the ice periodically and draining the excess water with a siphon. I also reduced current density by 30% and increased anodization time to minimize the heat generated. Under these conditions, the ice bath was maintained at a temperature of about 10 °C (according to an infrared thermometer), which cooled the anodization bath to about 24–28 °C, depending on its proximity to the part. The part came out perfectly anodized, and absorbed dye very well.
dye washed out
hydroxide drain cleaner
Side-Project: Measuring Bath Condition by Titration
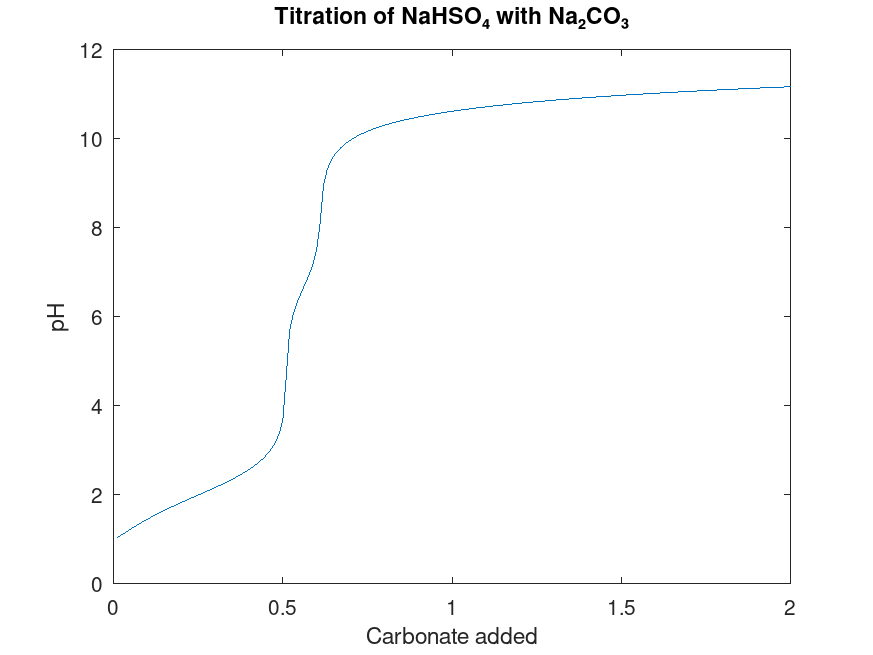
Since the bath falls outside the range of typical universal pH papers, they cannot be used to determine acid concentration. (Also they aren’t very precise.) Fortunately, the solution can be easily titrated to ascertain the concentration of bisulfate. Though this is most commonly done in industry with sodium hydroxide, sodium carbonate (Na2CO3), which can easily be made by heating baking soda (NaHCO3) in the oven, can also be used.
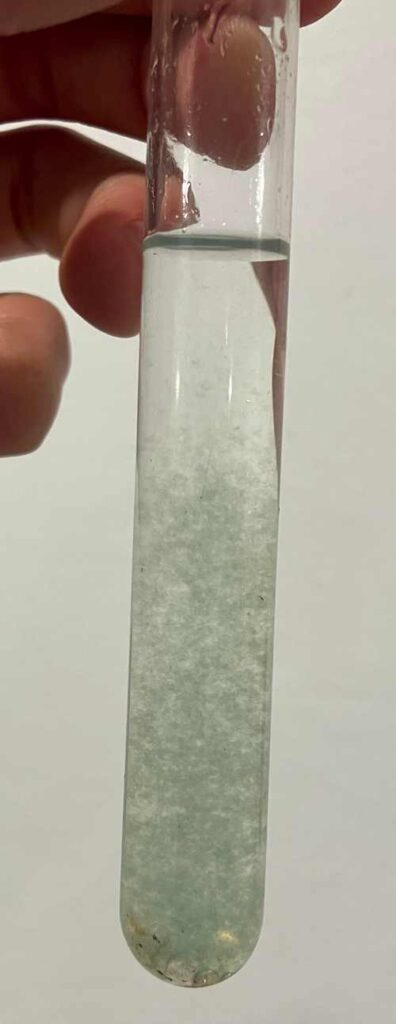
Briefly, the process is to remove a known volume of electrolyte, and slowly add in sodium carbonate solution of known concentration, which reacts to neutralize the bisulfate. When the number of moles of sodium carbonate added equals half the moles of bisulfate in solution, all the bisulfate is neutralized, the pH of the solution will abruptly increase, and gas will stop being evolved. Usually some pH indicator is used to detect this change, but in this case, the increase in pH is accompanied by a sudden precipitation of aluminium hydroxide, which serves as a good indicator in its own right.
The chemistry is more complicated than this simplified explanation suggests, especially since carbonate is a diprotic and weak base. To calculate the titration curve, I wrote a Matlab program to solve the simultaneous equilibrium equations governing ion concentrations and pH. It works by forming a system of polynomial equations to solve for the amount that each reaction must go forward or backward to reach equilibrium, then “throwing out” the non-linear terms, and solving the system. This is more efficient than using the built-in polynomial solver, and avoids the extraneous solutions that have negative concentrations. The linear approximation is fairly good if the starting conditions are already close to equilibrium, but if the solution obtained is not precise enough (if q is not close enough to keq), the simulation runs another iteration to converge closer to the true solution.
A particularly interesting question in this case is whether to consider this titration an open or closed system, with respect to dissolved carbon dioxide’s interaction with the atmosphere. Henry’s Law states that the equilibrium concentration of dissolved carbon dioxide is proportional to the partial pressure of carbon dioxide in the air, so under an open system, dissolved carbon dioxide should stay constant at about 1.4×10⁻⁵ M. But this equilibrium isn’t always reached in the short time of laboratory experiments, as shown by the pH of 8.3 found in a freshly-prepared baking soda solution; at this pH, the concentration of carbon dioxide is about 0.01 M. At equilibrium, the pH ought to be nearer to 10 or 11, and indeed, we see a marked rise in pH after bubbling some air through the solution for a while — I know this because I tried it.
Yet carbon dioxide can escape spontaneously in short time periods, if its concentration gets high enough — the effervescence of soda water, or the gas released when vinegar is added to baking soda are two common examples. My guess is that there is some “ceiling” to carbon dioxide concentration, above which it will out-gas; this is what I implemented in the simulator to calculate the titration curve. As this ceiling raises (making the system more closed), we see a titration curve with 3 distinct “steps” corresponding to where H2CO3, HCO3–, and CO32- are most prevalent; and as the ceiling falls, the middle step shrinks in width till the titration curve looks more like that of a monoprotic base. Since soda water is prepared at a partial pressure of ~2 atm gauge pressure (3 atm absolute pressure), corresponding to a concentration of 0.1 M, I’ve set that as the ceiling to get the titration curve shown below.
imperfect equilibrium between dissolved CO2 and the atmosphere.

equilibrium between the aluminium species
strongly favors aluminium hydroxide, which
precipitates as a solid. Source: Wikimedia
I did the titration in a test-tube, using a transfer pipette to measure out the electrolyte and sodium bisulfate. The sodium carbonate titrant was at a concentration of 1 M, prepared by weighing 10.6 g of freshly-baked (anhydrous) sodium carbonate into 100 mL of water using a precise kitchen scale. If using commercially-prepared washing soda, keep in mind that it is the decahydrate of sodium carbonate, so 28.6 g of washing soda should be added to 82 mL of water to produce 100 mL of solution.
To account for decreased bath acidity, more sodium bisulfate can be added, or, as stated previously, the current density can be decreased to maintain coating porosity.
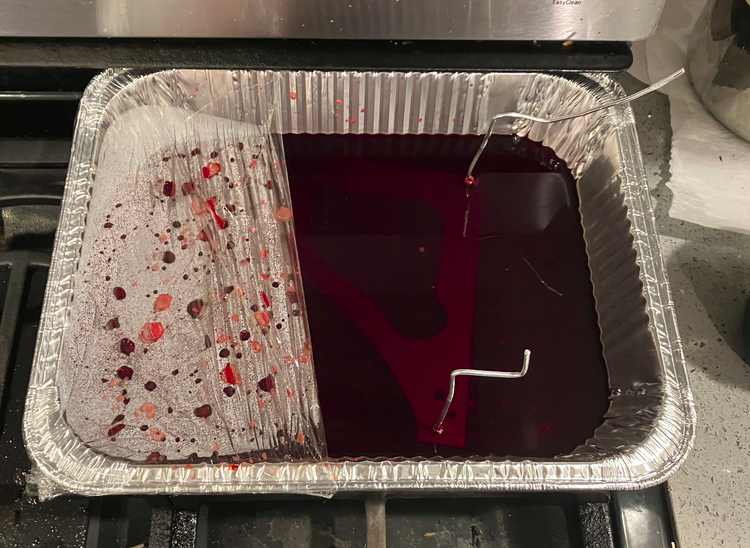
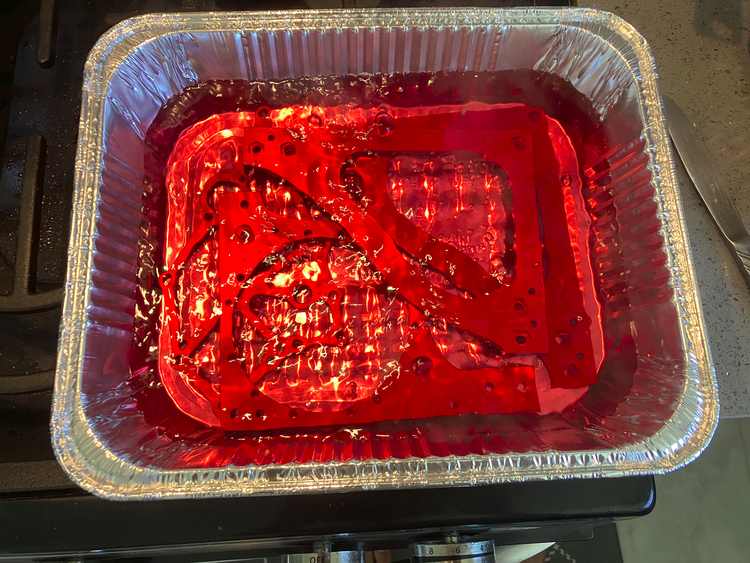
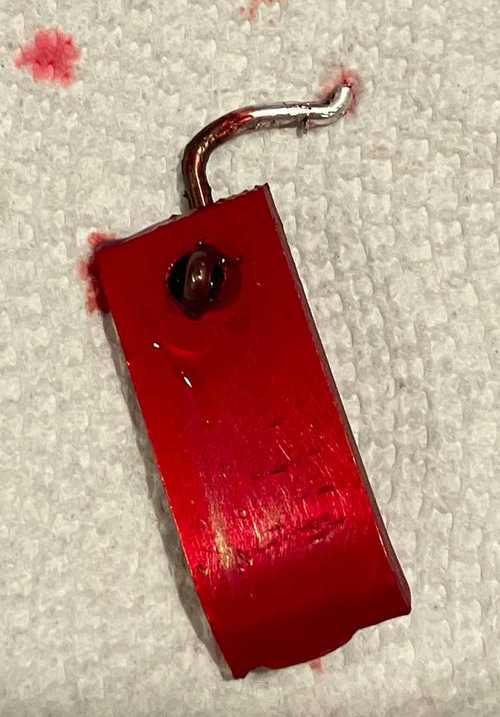
Dyeing and Sealing
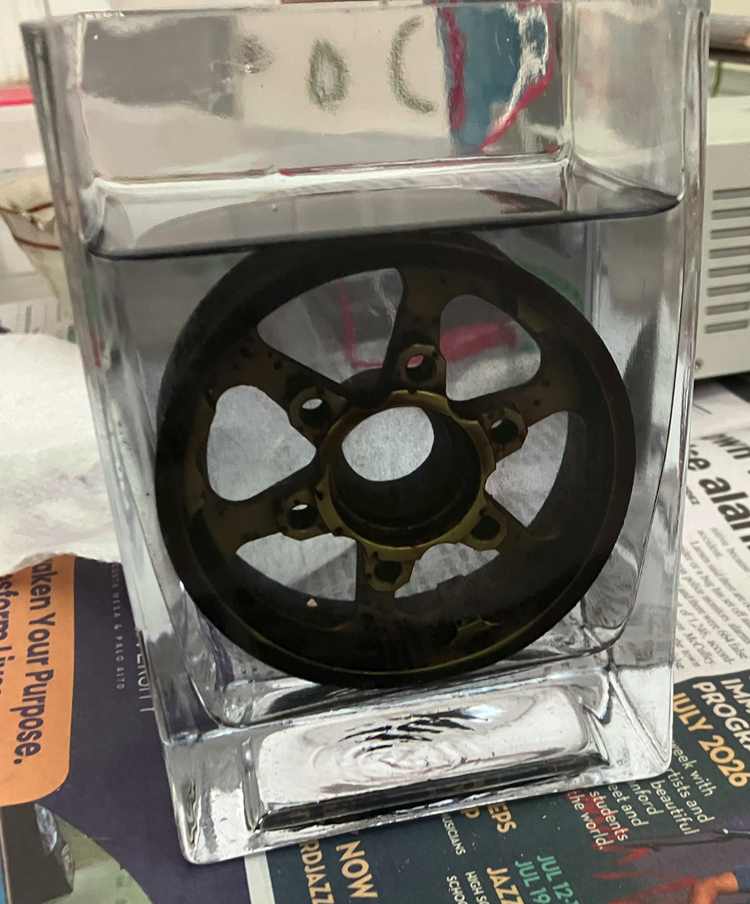
I used Rit clothing dye powder to dye the parts, making a concentrated solution in hot water as directed on the packaging, then diluting it with water in a 1:5 ratio to make the final dye bath. To dye flat plates, I used an aluminium serving tray, heating it over a kitchen stove on the lowest burner setting, which maintained the dye at the recommended temperature of ~50 °C. For blockier-shaped parts the only vessels I could find were of glass, so I heated them in a bain-marie to avoid cracking them by thermal shock. Parts were dyed for 15 minutes, though the parts pretty much stopped taking on more color by the 5-minute mark.
I did try dyeing a plate with cold dye, but it only took on a very light color; heating was definitely necessary. No adverse effects were observed from heating and cooling the dye many times.
Parts were sealed by boiling them in water for 15 minutes, which supposedly converts some aluminium oxide into aluminium hydroxide, which expands to seal off the pores. With correctly-anodized parts, only small traces of dye washed off during this stage.
Rit dye