
I previously used my drill press as a strength tester. Now, with two modifications, it can grind spade drills!
Modifications
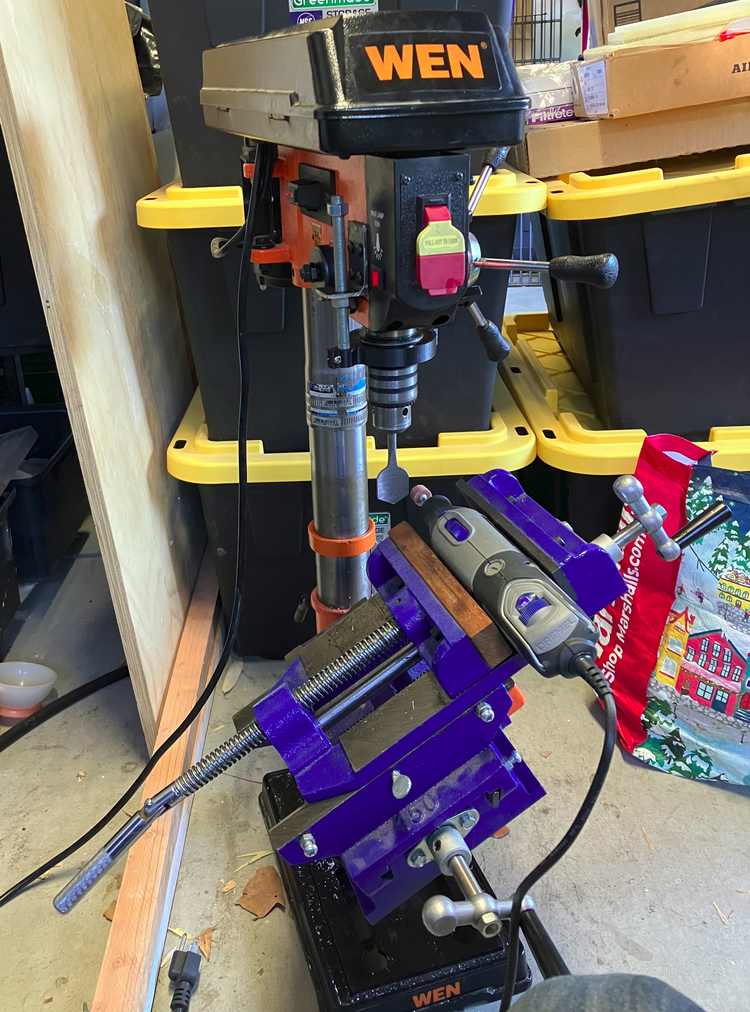
This tool grinder works by mounting a Dremel rotary tool in a cross slide vise and a tool in the drill chuck.
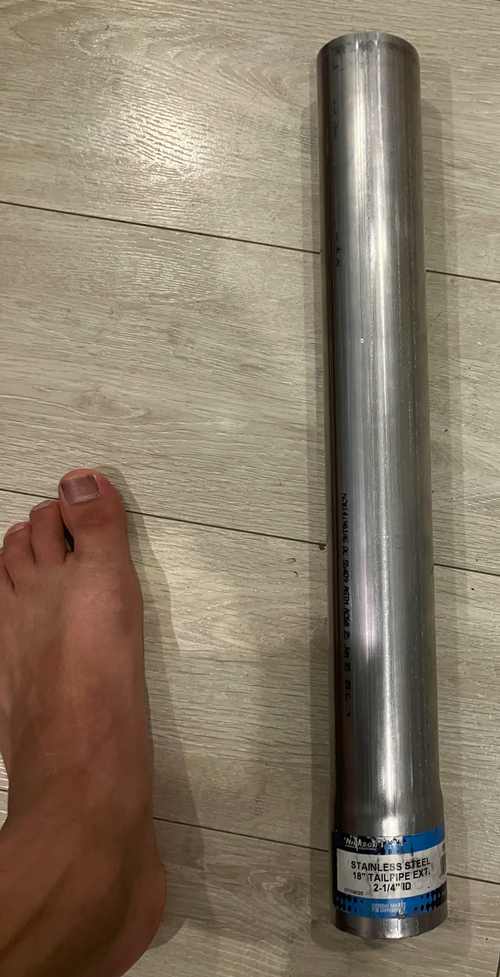
Column Extension
In some cases, tilting the table (discussed later) caused the original column height to be inadequate after mounting the cross slide vise and Dremel. Looking online I saw that people recommended extending the column with a length of automotive tail-pipe, so I measured my column, and quite luckily found a pipe at my local auto parts store that was almost exactly the right size (about 0.5 mm undersize). By cutting the pipe to length and sawing a slit into the belled end, I was able to slip it over the end of the drill press column, secure it with hose clamps, and re-mount the head on the end of the tail pipe.

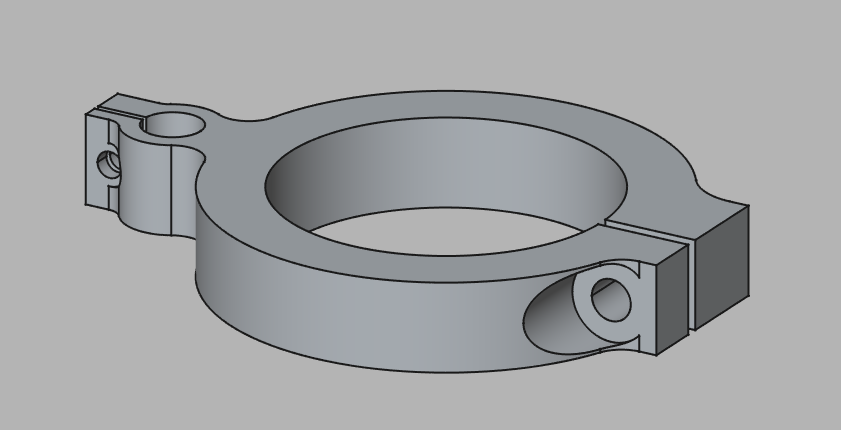
Depth Stop
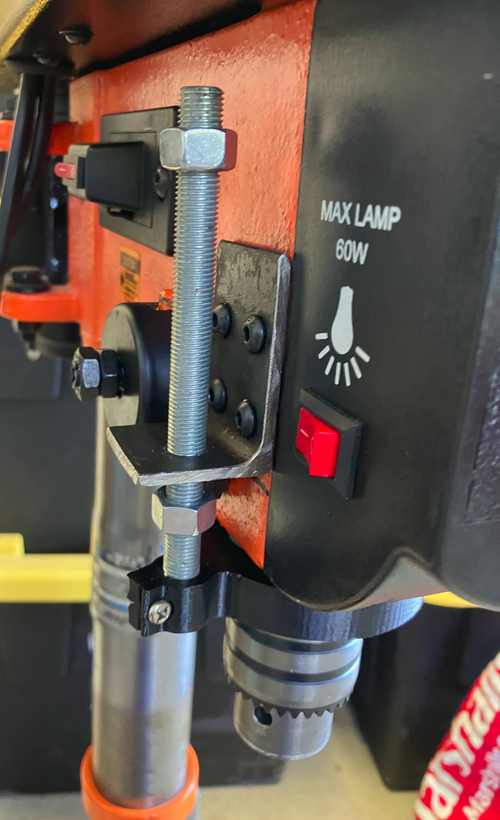
In order to precisely feed the chuck downwards, I had to make a depth stop. A piece of threaded rod was attached to the quill using a 3D-printed collar, and the threaded rod went through a hole in a bracket mounted to the head. Some nuts on the threaded rod, both above and below the bracket, are used to set an upper and lower limit to the quill’s travel.
The bracket was mounted with #10-24 screws going into threaded holes tapped in the cast iron head. The pilot hole was drilled with a hand drill, and tapping was done freehand; no problems occurred with this. Two of the tapped holes had to be in a thin part of the casting, so I had to be careful not to over-tighten those screws to avoid stripping the threads.
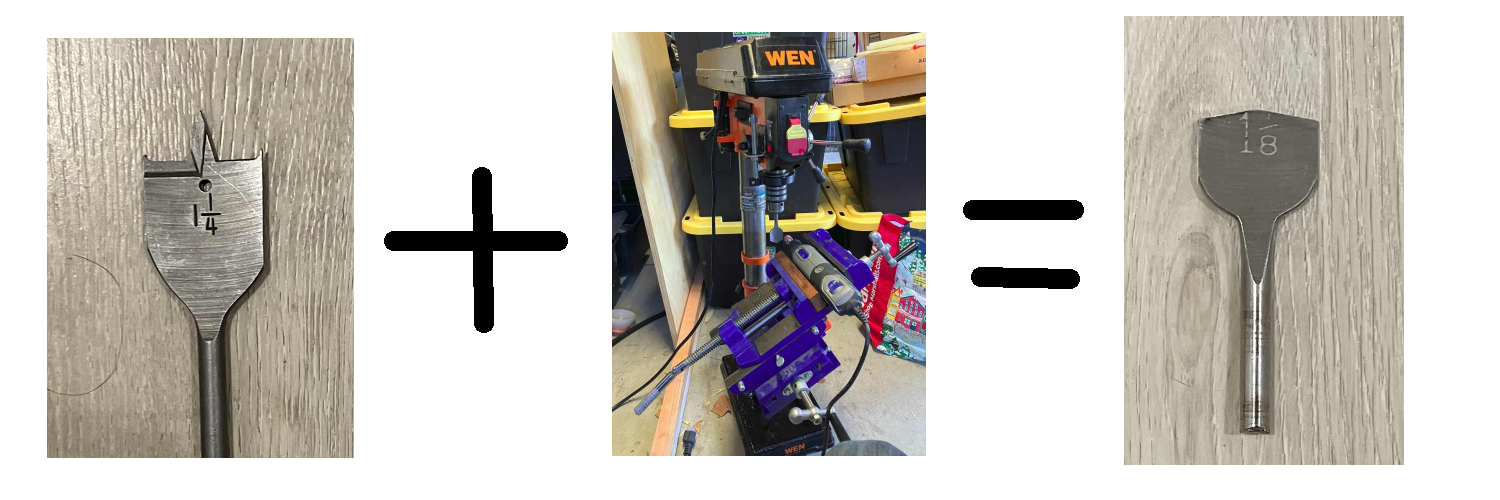
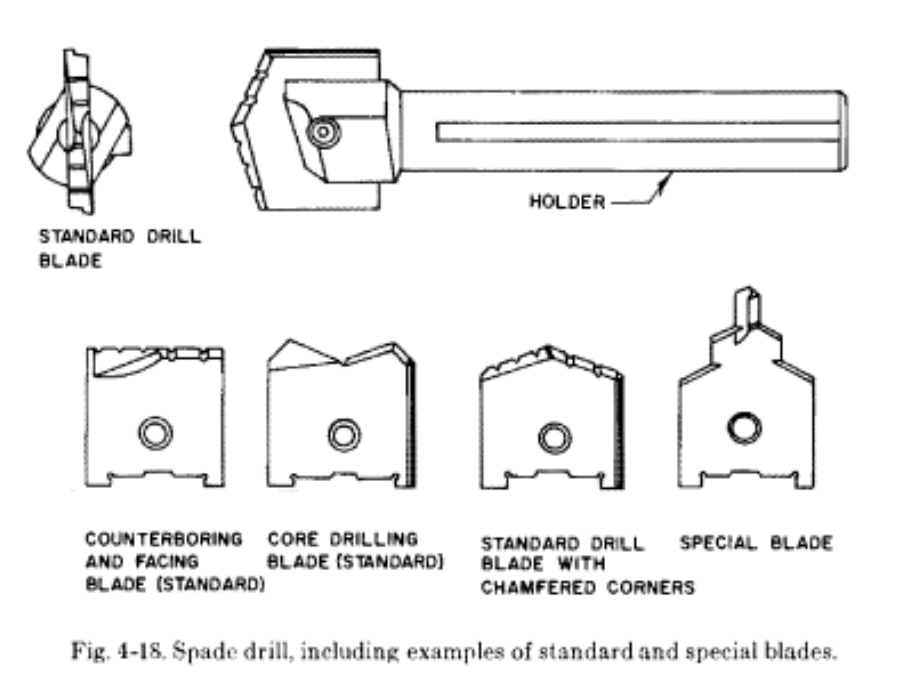
Grinding a Spade Drill
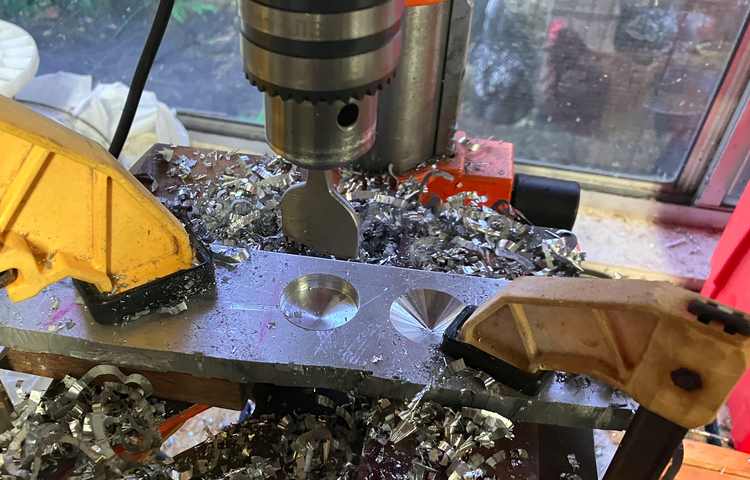
The usual way to drill large holes (> 1/2″) in metal is to buy a twist drill of the right size. These usually come with a Morse taper shank, making them unsuitable for smaller drill presses with a male Jacobs taper spindle, and are also usually quite expensive. However, a nice trick for drilling softer metals like aluminium is to use a spade drill of the sort made for drilling wood. Without any modification, this can produce surprisingly good results, especially if the drill is run at slow speed. As the drill gets bigger it tends to chatter more, the chip doesn’t peel off as smoothly, and the resulting hole is not so clean. Also, I’d imagine that the drill would dull quickly and this tip shape would be very difficult to sharpen.
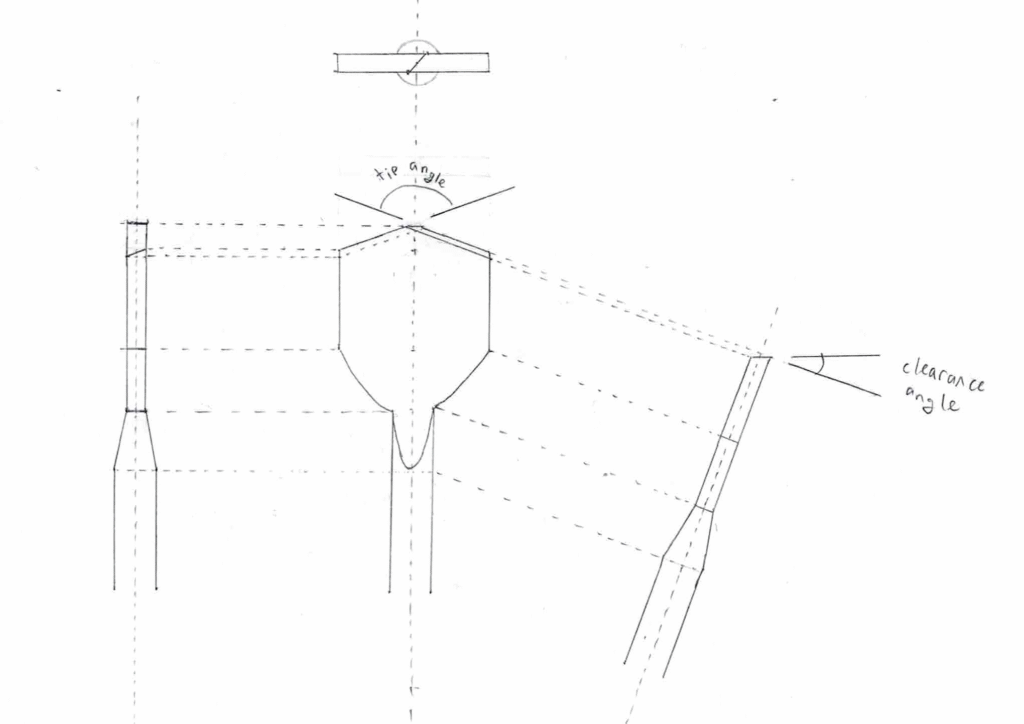
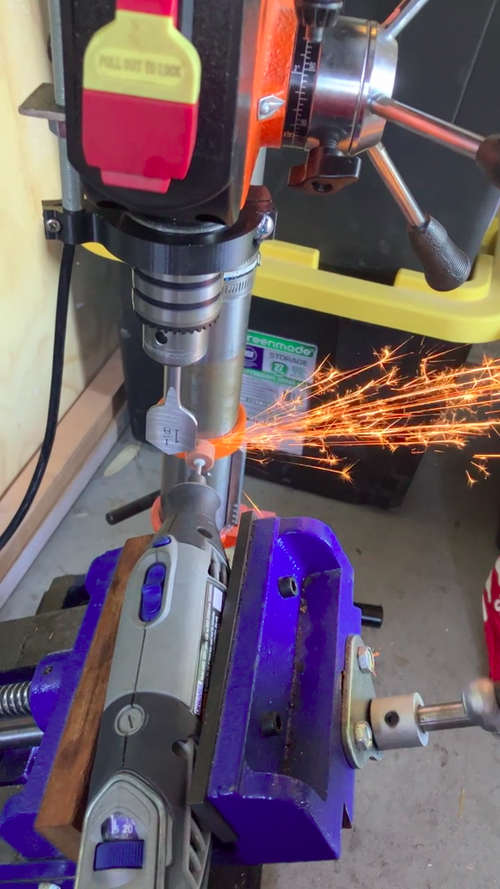
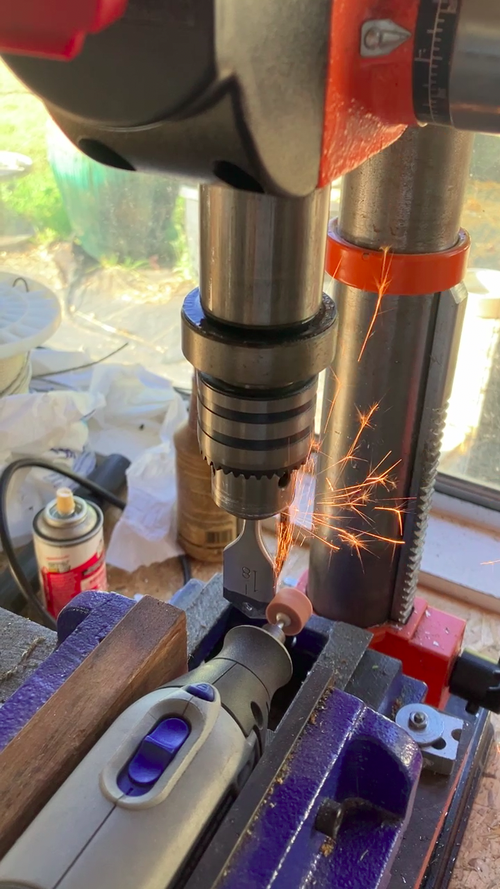
A more readily sharpened tip can be ground on the spade drill, similar to that used on twist drills. Two straight cutting edges are ground at an angle onto the drill, with proper clearance to ensure they can get under the chip. On my setup, this was done by angling the table counterclockwise to set the tip angle, and tilting the Dremel in the vise to set the clearance angle. The drill was rotated by hand to be aligned with the cross slide vise, and the Dremel was fed in using the vise’s longitudinal (left-right) feed. Then, the drill could be turned around 180°, and the other cutting edge ground. The depth stop was used to control the depth of cut.
When using a spade drill ground like this, a constant problem is chatter, since the shank and drill are so thin. Grinding the drill with a wider tip angle will mitigate this. Though all-purpose twist drills usually have an angle of about 120°, I had much better results with a tip angle of about 160° for a spade drill 1-1/8″ in diameter. When ground with this tip angle, and a clearance angle of 10°, the chisel edge at the web will be angled at about 45° to the cutting edge; this is an easy way to check if the clearance angle is right. Both sides of the drill must be ground symmetrically, which is easily done with my setup. Also, common sense dictates that cutting the shank shorter will allow the drill bit to be mounted nearer the chuck, stiffening it somewhat.
Finally, when using a spade drill with the tip ground as previously described, a pilot hole must not be drilled. This will cause the drill to chatter excessively, no matter how well the drill is ground. Drilling with and without a pilot hole is a night-and-day difference. However, with the drill ground in the original woodworking shape, a pilot hole may be drilled; the spurs at the edge tend to stabilize it against chattering.
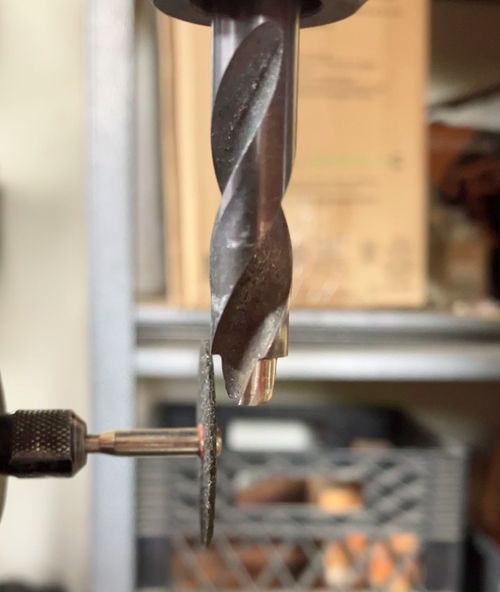
I was also able to use the cross slide vise to grind the drill to the right diameter. This was done by using the quill feed to move the drill up and down across the grinding wheel, and the cross-slide vise’s left-right movement to control the depth of cut. Experimentally, I’ve found that the diameter of the hole is within about 0.003″ of the drill’s diameter, which is close to the precision of a twist drill.
Similar to the woodworking tip, the core drill has spurs to
stabilize the drill when drilling out a cored hole in a casting
shown here is waaaay too sharp.
sharp tip angle.
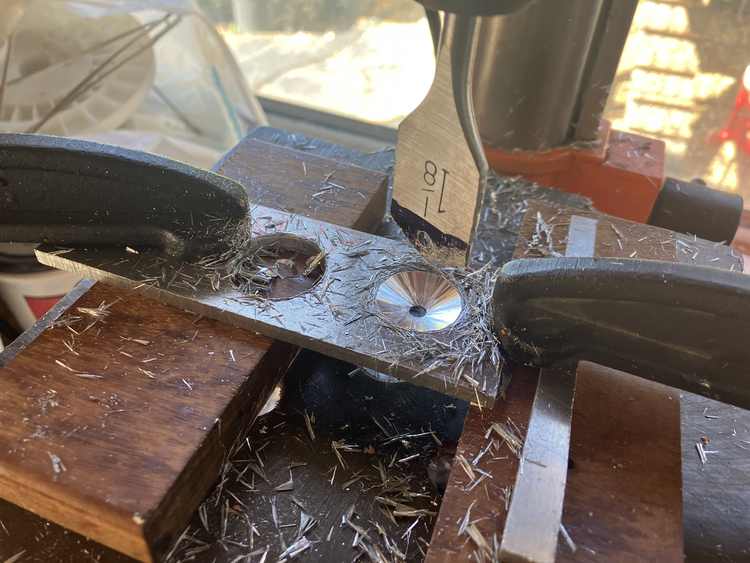
irregular drilled surface
nice long chips.
Grinding a Counterbore
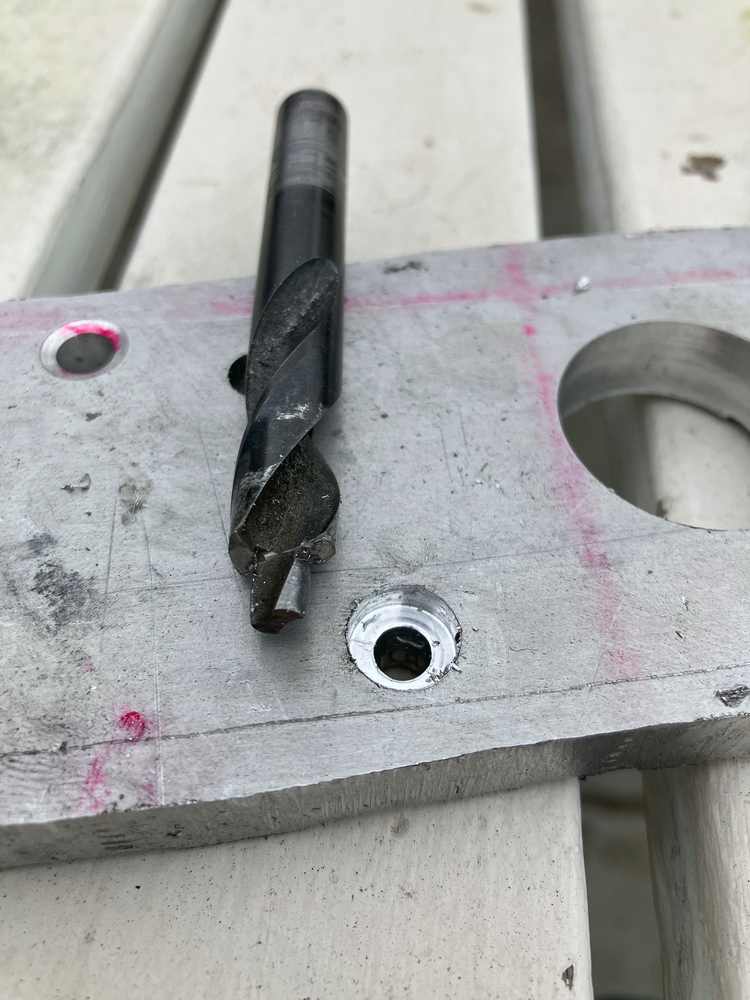
Counterbores, used to produce a flat-bottomed bore in a hole for a screw head to fit into, are another tool that is somewhat out of reach for hobbyists. They consist of some cutting edges to form the bore, and a pilot that guides the tool concentric with the hole. This drill press grinder was used to grind the pilot and a squared-off cutting edge by bringing a cutting wheel in front of drill bit, then moving the Dremel in while continuously rotating the counterbore by hand to ensure the pilot’s concentricity. Then, by hand grinding, the shoulder was undercut slightly to prevent it from wedging into the hole, and the cutting edges were relieved.
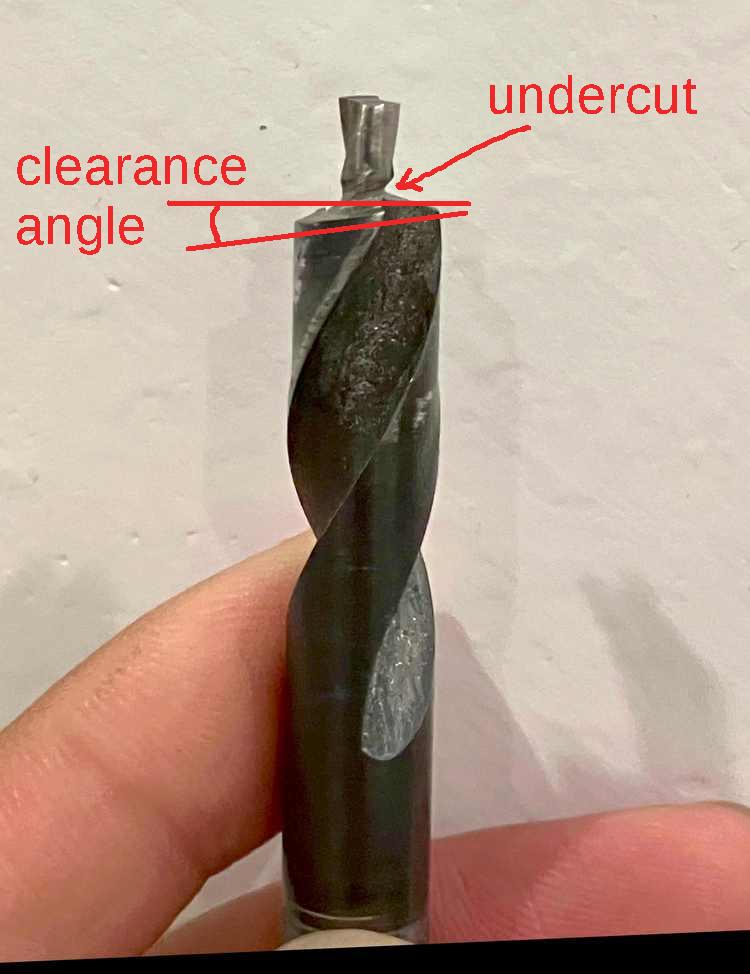
Clearance and undercut were added by hand.
for #10 socket-head screws.
5 responses to “Drill Press Tool Grinder”
furosemide
furosemide
sildenafil medication
sildenafil medication
fluconazole tablet
fluconazole tablet
diflucan
diflucan
lasix diuretic medication
lasix diuretic medication