
Introduction
For no reason at all, I decided one day to make one of those top-lit updraft (TLUD) wood gasifier stoves that are a common design for DIY small biomass-fueled stove projects. The design has been researched pretty extensively and is viewed as a promising stove design to replace dirty and smoky biomass stoves commonly used in developing countries. It has the advantage of simplicity, versatility, efficiency, and being very clean-burning.
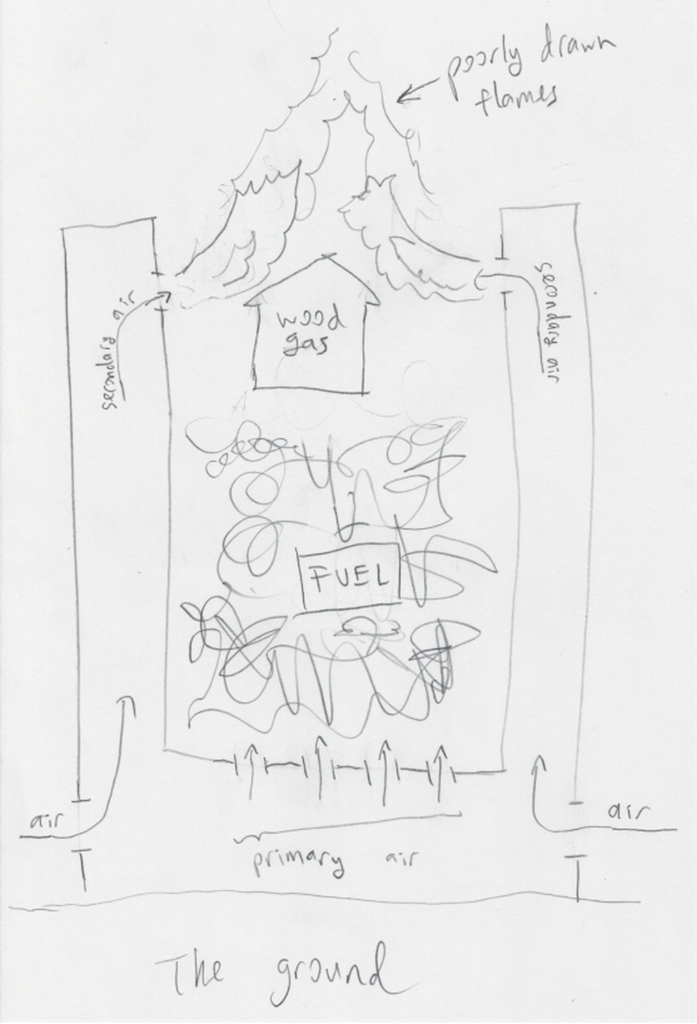
The TLUD operates by creating and burning wood gas efficiently. This is accomplished by limiting the amount of air a lit batch of biomass (usually small sticks) receives, producing flammable wood gas (the smoke you see when a fire doesn’t have enough air), which is burned by the addition of more air. Some air is allowed to reach the pile of biomass to continue the pyrolysis reaction, but not enough to burn the wood gas.
What I Made
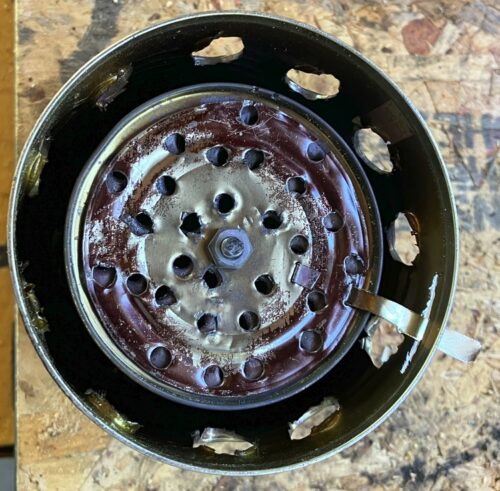
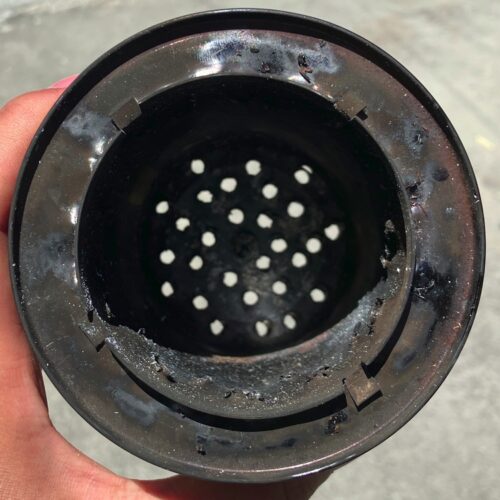
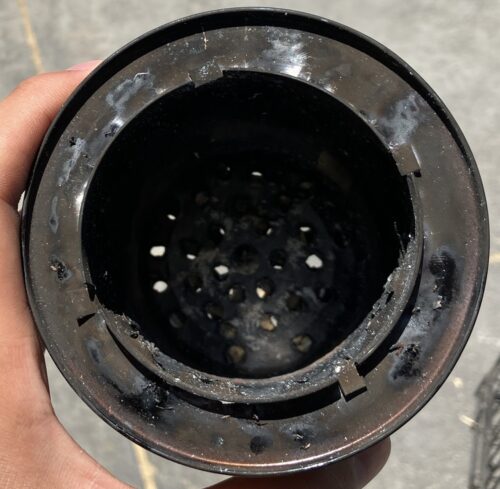
Practically, the stove is constructed by taking a tin (i.e. sheet steel) can and poking holes both on the bottom and around the rim. When filled with biomass, the bottom holes permit some air (the “primary air”) to enter, allowing the wood gas-producing reaction, and then the gas rises up where the air let in by the holes around the rim (“secondary air”) lets the wood gas combust. This can is usually nested inside a larger can to produce a space where the secondary air can be heated before entering the burner. I suspect this space also forms a sort of chimney which creates a natural draft that pushes secondary air out of the holes.
This basic design, which has been shared all over the internet, works pretty well. The general consensus seems to be that you need much bigger and more numerous holes for primary air than for secondary air.
I secured the burner can (the smaller one) to the surrounding can (the larger one) by cutting out tabs on the burner and bending them back. It seems to give a more secure fit than simply slightly undersizing the hole in the surrounding can and using a press-fit.
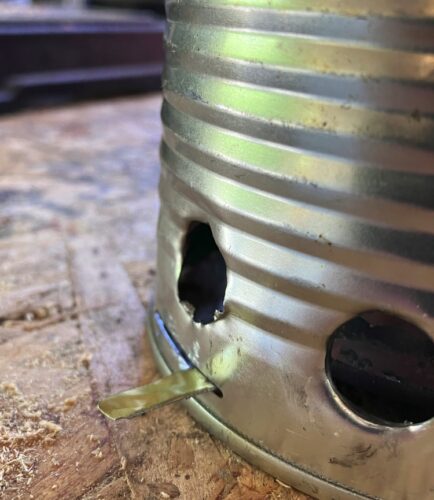
In an attempt to give more controllability to the stove while still making it out of commonly available materials, I created a damper for the primary air by taking the original cover of the burner and drilling holes in it in the same pattern as the primary air holes. I then attached a handle for turning it, made out of a strip of tin that was threaded through two slots I punched in the damper plate. A slot was cut with a hacksaw in the surrounding can to accommodate the damper handle, and the damper was screwed to the center of the bottom of the “burner” can, allowing it to turn.
How Well It Works
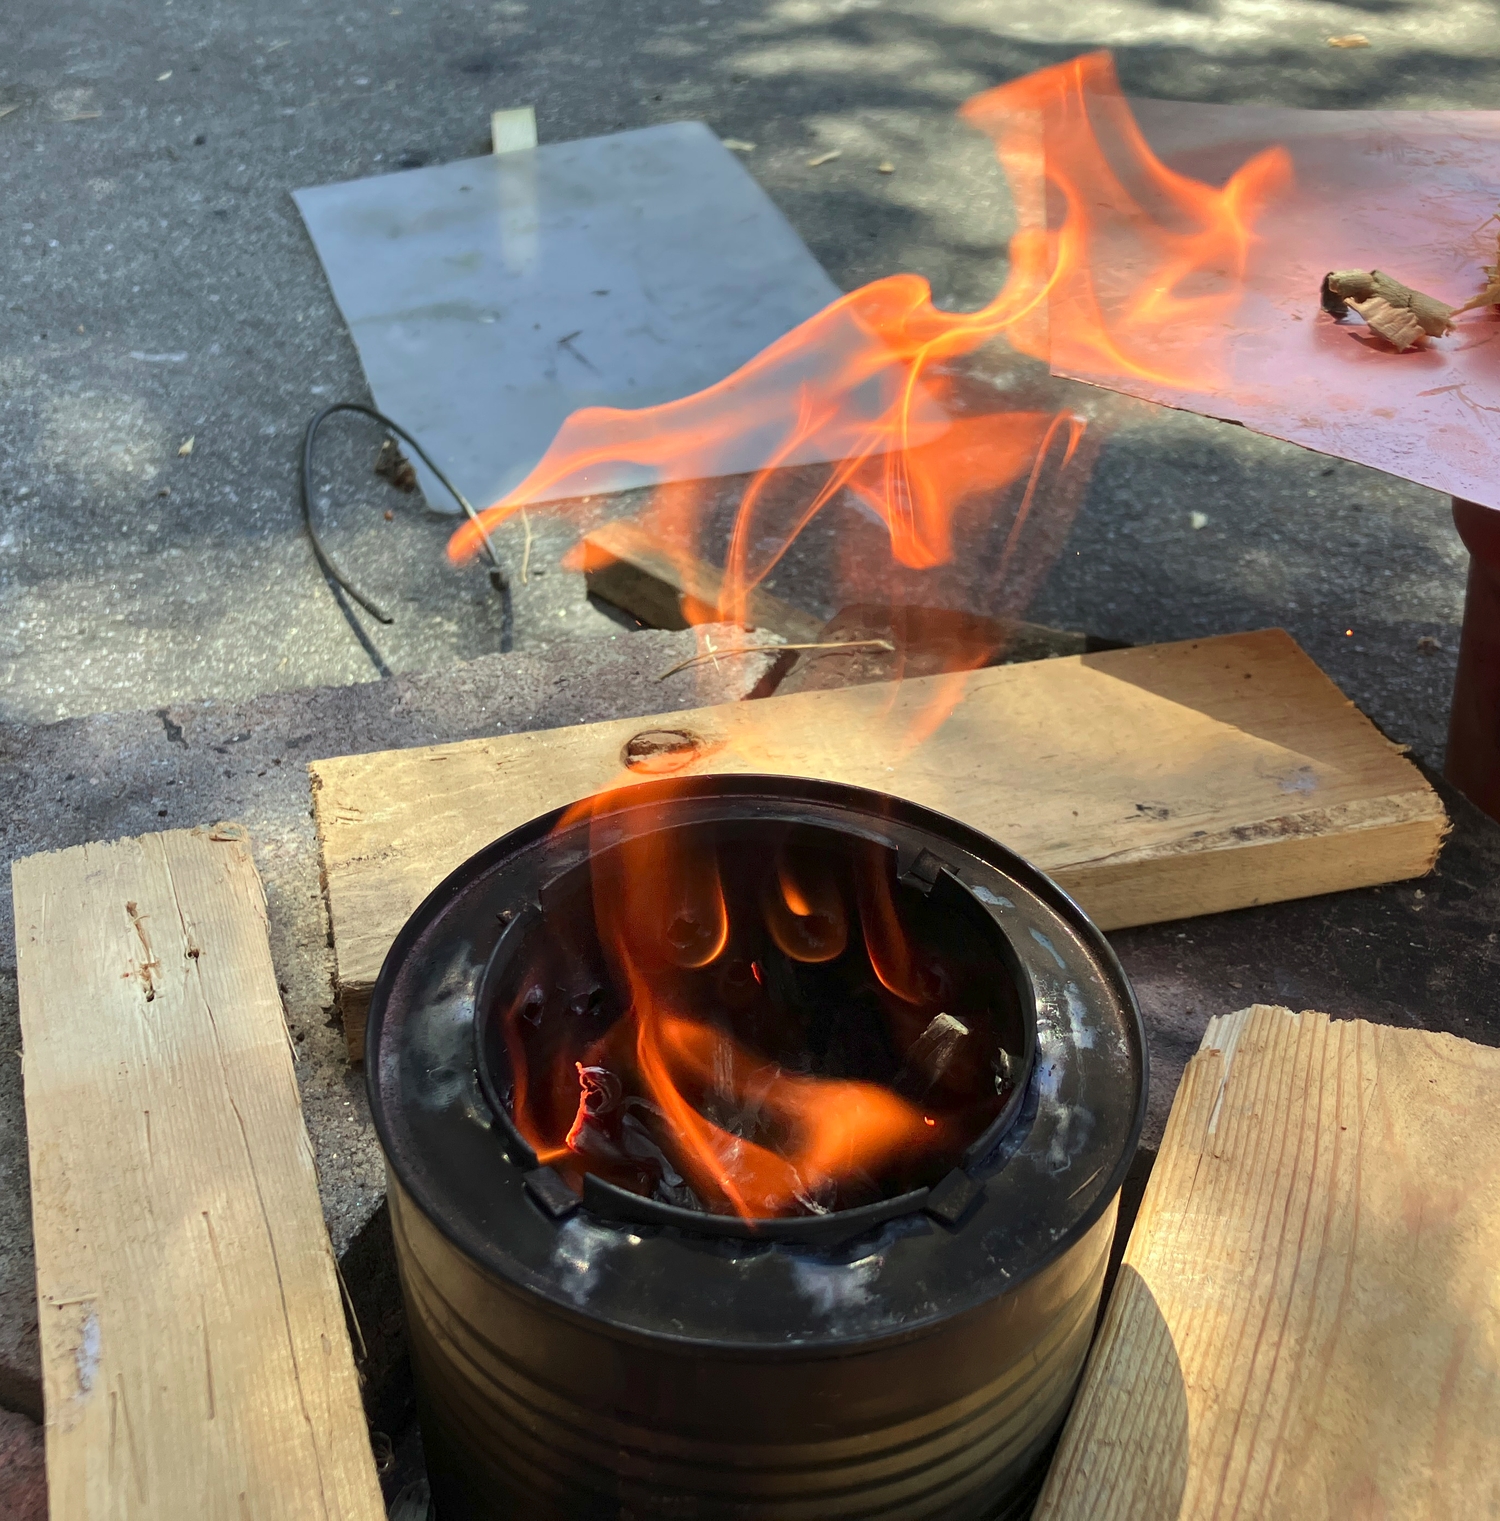
Before getting into how well it works, let me quickly explain how it’s used. First, a batch of fuel is loaded into the stove. The stove is meant to be operated in batches, not have fuel continuously fed. Then, the fuel is lit using something like lighter fluid, paper, or wood shavings. The fuel then pyrolyzes from top to bottom, releasing wood gas for some time until all the fuel is turned to charcoal and the stove is done. If the charcoal is left in the stove, it will slowly burn to ashes; you can also dump it out and burn it in a charcoal-burning stove or use it as fertilizer.
My stove is quite small, so it doesn’t burn for very long. However, as noted by various people on the internet who built stoves similar in size to mine, you can continuously feed fuel into the stove (if you have a pot stand designed for this) and it will still burn cleanly.
The damper doesn’t work well at all. Factors like wind, fuel shape, and amount of fuel are far more likely to affect burn rate than the damper’s position. I tested the stove by fueling it with 37 g of wood chopped into pieces about 50 – 70 mm long and about 5 mm in diameter, put bricks around the base to shield it from the wind, and lit it with wood shavings. With the damper closed, the stove burned for about 6:15, while with it open it burned for about 4:45. That is, closing the damper increases the burn time by about 32%. Assuming power × burn time is constant, power was decreased by 24% by closing the damper. Given the work needed to add it, and the variety of other methods you could use to vary the power of this stove, it’s not worth it.
This article from MAKE magazine suggests that you can control burn time and power output by varying the size of the opening above the can. I tried this by cutting a 30mm hole in the bottom of another soup can (since it forms a tight seal with the burner), cutting off most of the top of the can, and operating the stove with this installed on top of the burner. This resulted in a burn time of 6:30 with the damper closed, and 6:00 with the damper opened.
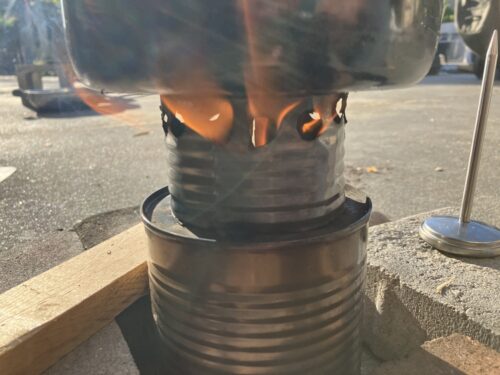
To use the stove, I added a pot stand made from a sheet of tin bent into a cylinder with some 3/8″ (~ 9.5 mm) holes drilled near the top to allow exhaust gases to escape. Unfortunately, when a pot was put on top of this stand, I found out that the air provided by the secondary air holes was insufficient to completely combust the fuel, leading to a lot of uncombusted wood gas (mostly carbon monoxide) coming out of the exhaust holes. (Without the pot stand, extra air was available to the flame as it emerged from the top of the can, allowing for a clean burn.) The initial stove design used 20 3/16″ (~5 mm) secondary air holes; they were enlarged to 5/16″ (~8 mm), which diminished but did not fully solve the problem. I also tried using a pot stand made by assembling two pieces of tin about 80 mm long and 15 mm wide into an “X” shape, which seems to allow more air to reach the flame though it gives decreased wind protection and may not transfer heat to the pot as effectively.
The amount of secondary air available increases linearly with soup can size (since secondary air holes are drilled around the circumference of the can) while primary air increases quadratically (i.e. proportional to the square of size) since primary air holes are drilled on the bottom of the can. This implies my smaller-than-typical stove should let in not enough primary air, but this doesn’t seem to be the case. I suspect that other stove designs (like this one), which use larger cans and/or more primary air holes, allow excess primary air into the stove to pre-combust some of the wood gas and reduce the secondary air needed. Other designs (like this one) are more similar to mine and use larger/more secondary air holes.
What to Try Next
I’ll probably try taking this stove on a backpacking trip to see how well it fares burning fuel like twigs and pinecones.
I also might try modifying the stove to cleanly combust oil without the need for a forced draft while being more powerful than an oil lamp, using a design similar to this one. I’ve already tried throwing in a few oily rags and lighting them up, and they burned for nearly 10 minutes, producing a large and clean flame, though adding the pot stand and pot caused incomplete combustion to occur. In the future, I might try putting a small oil-fueled “buddy burner” inside the stove and seeing how well it works.
To solve the incomplete combustion problem, I will experiment with different pot stands to find one that allows additional air to reach the flame while still efficiently transferring heat to the pot.