
Introduction
Where I live, the soil has a very high clay content, so I’ve tried a few times in the past to turn it into some usable clay-like material. Clay is easier to work with than metal and wood, can endure high temperatures unlike plastic, and is more durable.
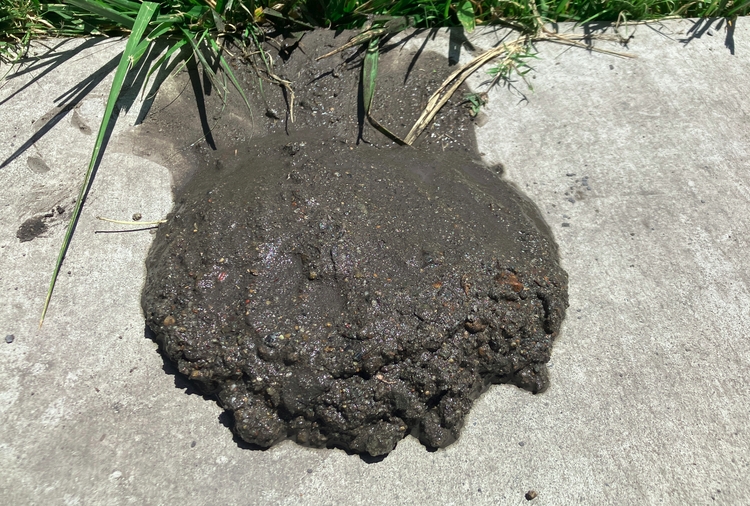
In my attempt to cast zinc, I simply mixed dirt with enough sand to prevent cracking and formed it into very simple molds that by virtue of their porosity were really temperature-resistant. (Seriously. I used this sand-dirt to make a tiny blowtorch-powered furnace and used it to melt copper. You could see the steam coming off the molds, but they didn’t crack.) However, they were really weak and crumbly, so they couldn’t be used to make complex molds.
Dirt → Clay
First, I used levigation to purify the clay soil using the method outlined in this video. The process takes advantage of the fact that clay particles can stay suspended in water for a long time, but not forever:
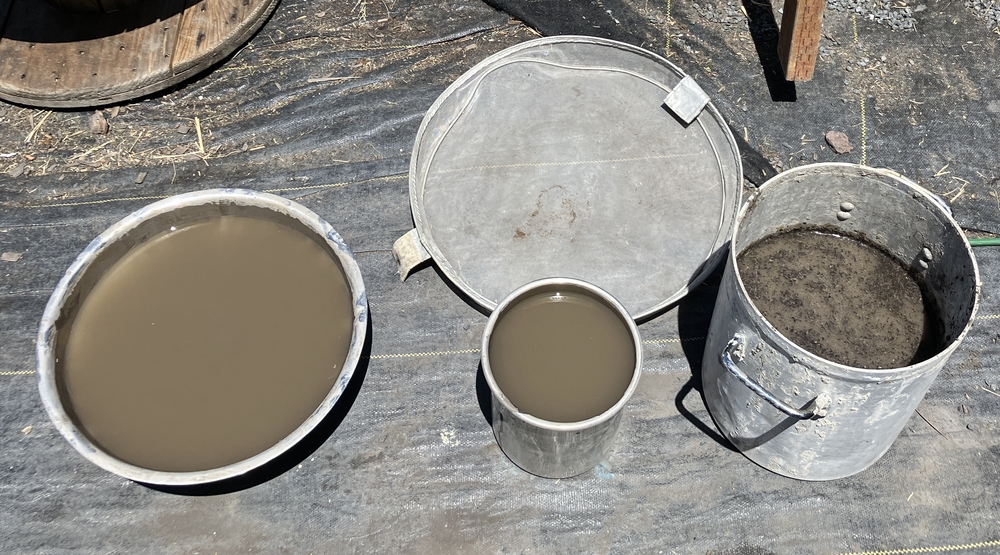
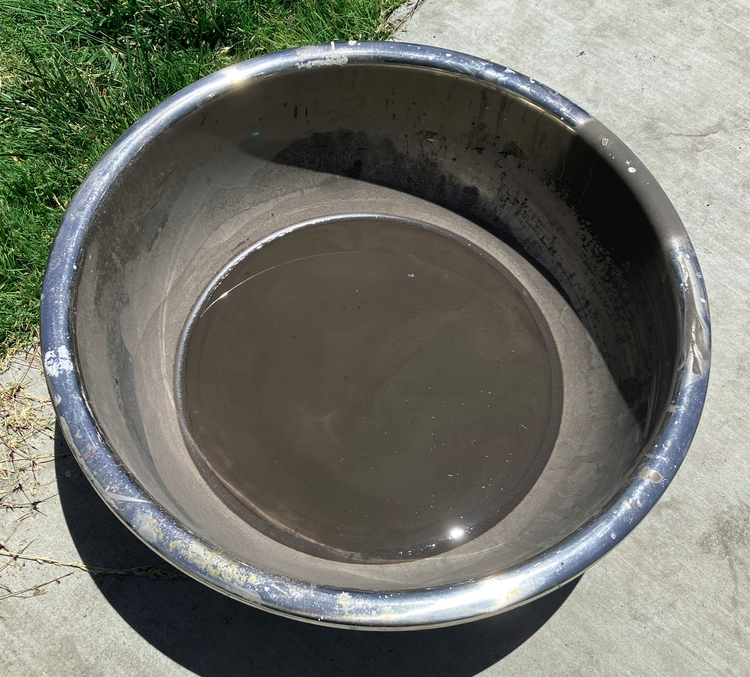
- Get a basin and fill about 10–20% full with dirt and the remainder with water. Stir until the dirt chunks break up
- Wait some time (1–2 minutes) for the sand and silt particles to settle. (NOTE: a lot of sources I saw say this takes longer)
- Decant the clay-water through a sieve (to catch sticks and other large floating things) into another basin, leaving the sand and rocks behind in the first basin.
- Wait for the clay in the second basin to mostly settle out. After the clay has mostly settled, the water should be more or less translucent and there will be a layer of clay at the bottom of the bucket. You don’t have to wait for all the clay to settle and the water to become clear, this takes hours.
- After the clay has settled, decant the water back into the first basin.
- Repeat.
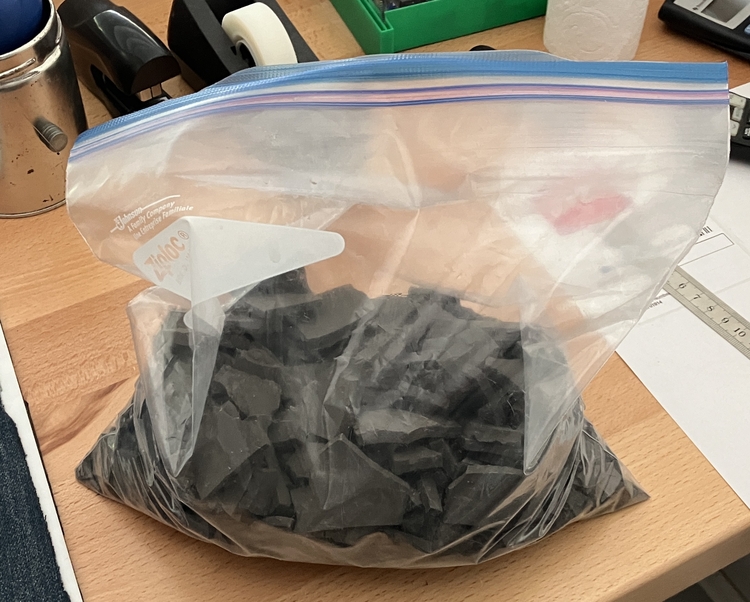
After some time, there will be a thick layer of clay at the bottom of the second basin and you can leave it out to dry. This yields little shards of brittle yet tough dried clay.
This repeated decanting can take a while, especially with a clay like mine that is so reluctant to settle, so another commonly used method involves filtering the clay-water through a cloth filter, frequently a pillowcase. However, I didn’t have any pillowcases I wanted to sacrifice.
Firing
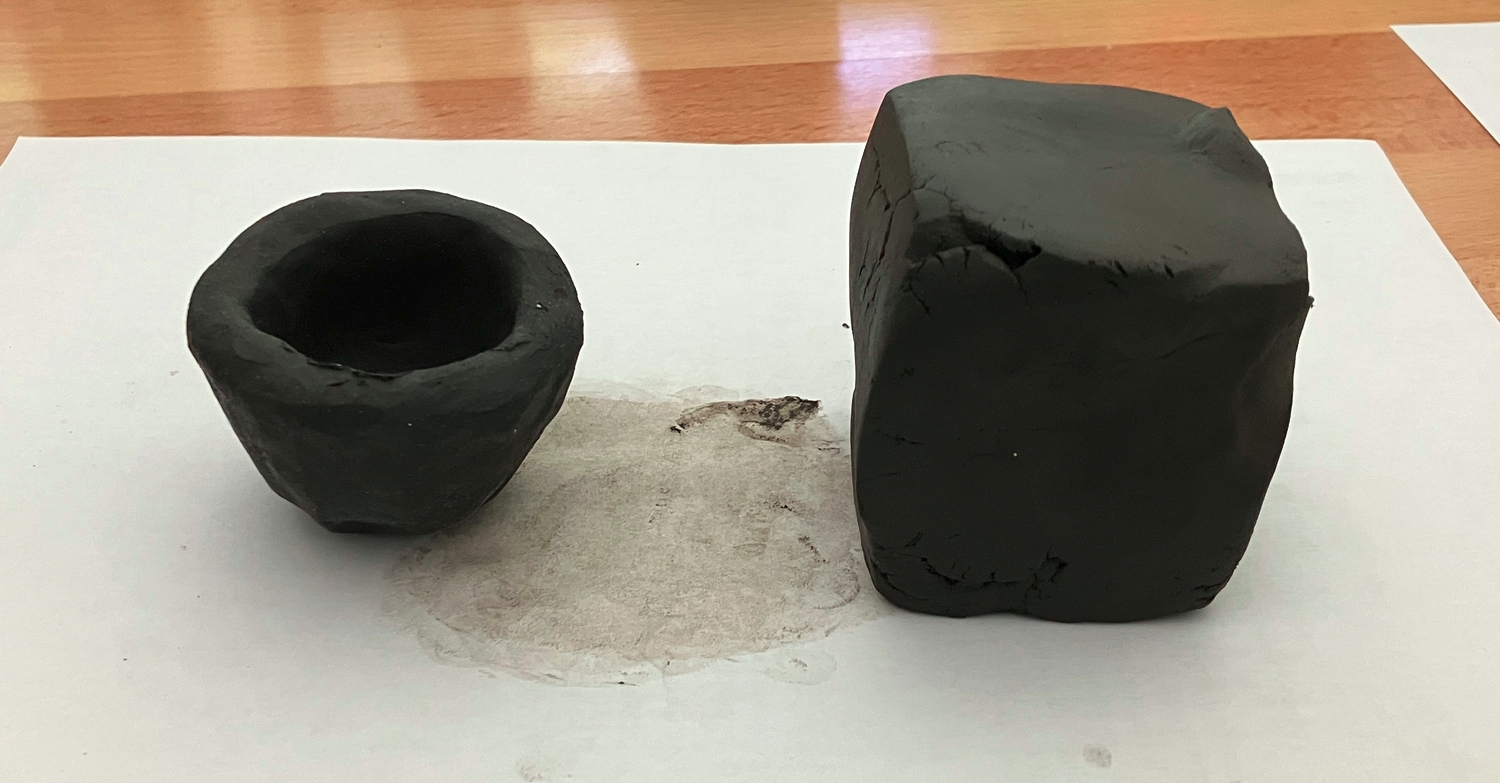
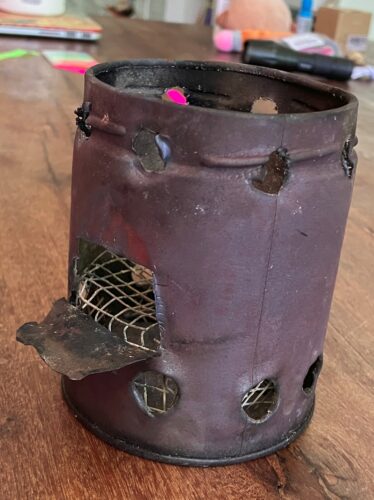
As mentioned in a previous blog post, I tried using a blowtorch to fire the clay in reduction, and then a tin-can stove to fire in oxidation. This resulted in very different colors of clay and you can read about it here.
The tin can stove was very useful for firing small test pieces. I used 3–4 pieces of roughly 200 mm × 40 mm × 15 mm scrap pine wood as fuel for each firing, chopped into small sticks about 15mm in diameter and 60mm in length using a hammer and chisel. I have yet to try pit-firing larger parts.
Stuff I’ve Tried So Far
| What I tried: | Notes on working properties: | Notes on drying: | Notes on firing: | Notes on finished product: | Possible application: |
|---|---|---|---|---|---|
| Levigated clay, no temper. | Sticky and plastic. | Lots of cracking, even on small parts. | Cracks even more. | Tough and brittle. Weak at hairline cracks. | None |
| Levigated clay, ~20% diatomite temper | Slightly less sticky and plastic. | Much less cracking, but can still occur when part is dried unevenly. Part is generally tough, but breaks very easily at hairline cracks. | A test piece I made exploded because it wasn’t fully dried. | Tough and brittle. | General use. |
| Raw dirt | Sticky, but not very plastic. Improved wet strength. | Cracks, especially where there are large rocks embedded in the part. What did you expect? It’s just dirt. | None. | Weak wherever there are large rocks, carbonized organic matter, etc. | Bricks, very cheap and weak parts |
| Dirt tempered with lots of sand | Still relatively plastic. | Resists cracking very well, even when dried very unevenly and quickly. | Can probably be fired with a bit of moisture. | Tough at smooth edges and thick sections, but crumbly in thin sections. | Easy-to-make parts that don’t have to be strong. |
| Levigated clay rehydrated with vinegar, tempered with diatomite | Much less sticky and plastic | White residue appears on the outside. | Spalls heavily when firing. | Weak and brittle, comes apart in layers. | None |
| Levigated clay with oil | Plastic but not sticky | Cracking similar to levigated clay with no temper. Bone-dry part is very very weak. | Likely to come apart during firing | Weak and brittle | None |
There is a saying that goes something like, “fast, cheap, good: pick any two”. This applies here if you replace “fast” with “easy”
- Sand-dirt is easy and cheap, but not good.
- Levigated clay with diatomite temper is cheap and good, but not easy.
- Store-bought clay is fast and good, but not cheap.
Note on rehydrating clay:
There are a few ways to rehydrate dry clay. One way is to grind it up, which lets it rehydrate very quickly, but this is labor-intensive and I don’t have an efficient way to grind clay. Another is to mix it with excess water to quickly break apart all dry clay chunks, then filter off the water, but I found that this took really long, even with a lot of water. The best way in my situation was to put the dry clay in a sealed plastic bag with some water, then sink it at the bottom of a bucket of water, letting the water pressure at the bottom of the bucket speed up rehydration.
Conclusion
I would like to more thoroughly study the effects of the amount of temper and water on the clay. However, as this project is primarily to further my metal casting interest, I am reluctant to pursue it in depth. I will hammer out a few more details in my process and try some new things to get clay that is as easy/fast, good, and cheap as possible, and put that in a part II of this post.
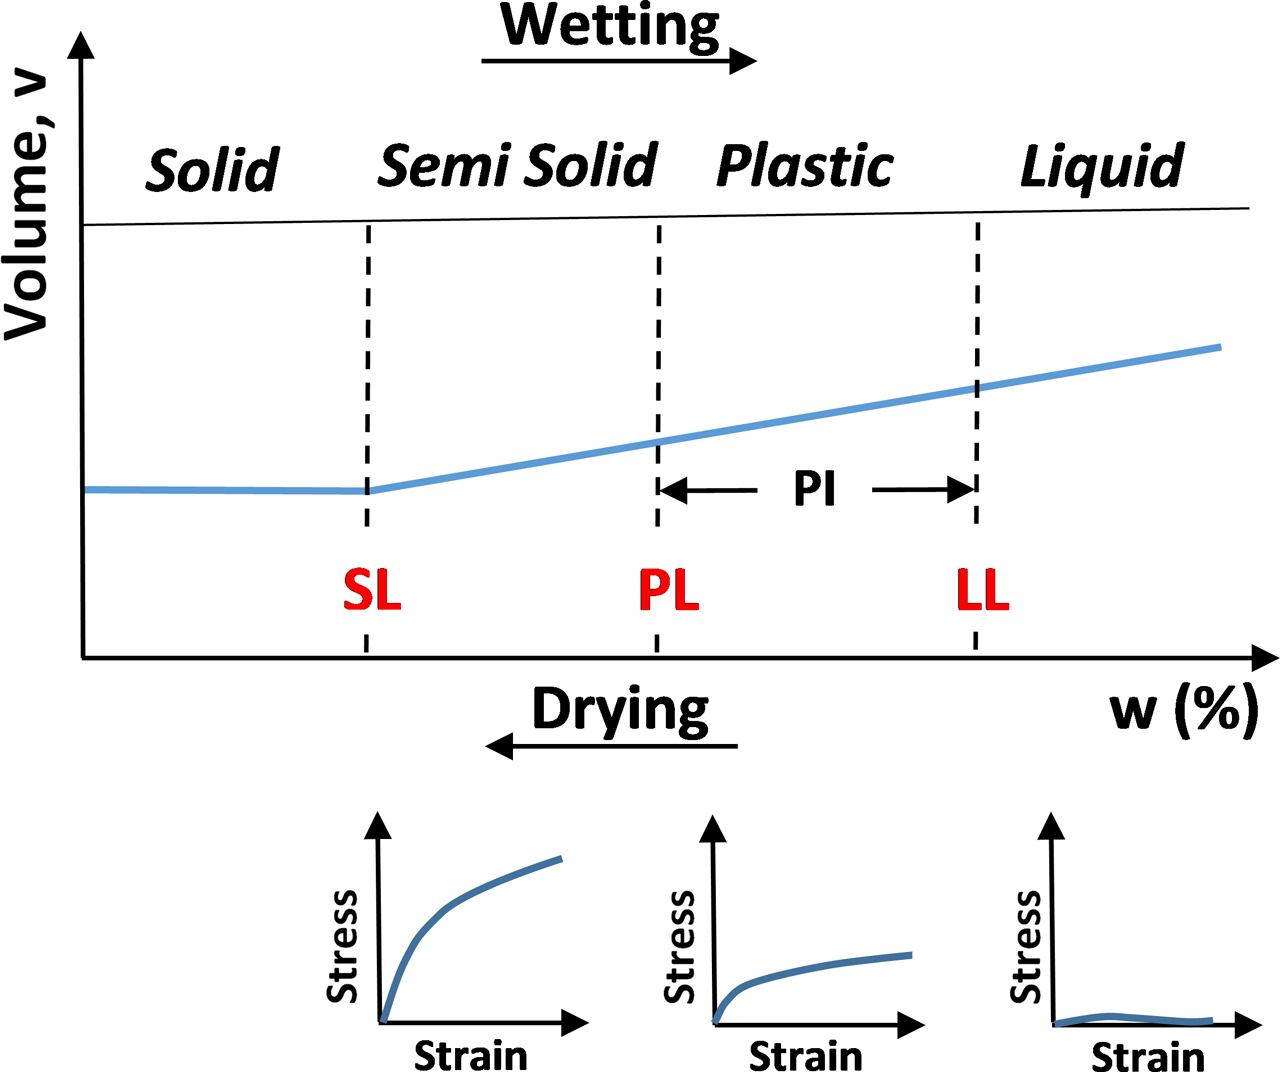
UPDATE: 2025-07-14 By working samples into bars, and then scratching marks into the clay 100 mm apart, I determined that clay from my backyard has shrinkage of about 12% (from 100 mm to 88 mm), whereas clay obtained from the Palo Alto Baylands shrinks about 8%. From a chart I found at a local ceramics studio, most pottery clays shrink at a rate of about 10%.
It’s important to note that clay volume increases more or less linearly with water content, flattening out below a certain threshold. Because I didn’t make any effort to start the clay out at some standard water content, there is necessarily some imprecision in my numbers.
One response to “Clay”
[…] this blog post, I detailed several ways of using backyard clay. The method that produced the best […]