
Disclaimer
The methods described in this post worked for me. There are many factors that affect whether or not any of this may work for you, but two big ones are weather and soil conditions. Here in Palo Alto, we have clay soil and the weather is hot and dry, at least in the summer. The molds that I’m making are one-part molds, which tend to be simpler, but these methods probably apply to two-part molds as well. Also, I am casting with zinc, a low-temperature, runny metal that takes well to casting.
Also, a note about safety: although zinc is a low-temperature metal that is unlikely to make anything explode, it does have one very major hazard: molten zinc looks basically the same as cooled zinc, so it is required that you check before touching a part. But even a solidified part can be very hot, so you should also check its temperature by putting a drop of water and seeing if it evaporates.
More safety information about zinc is linked here: https://theodoregray.com/periodictable/zincsafety.html
Introduction
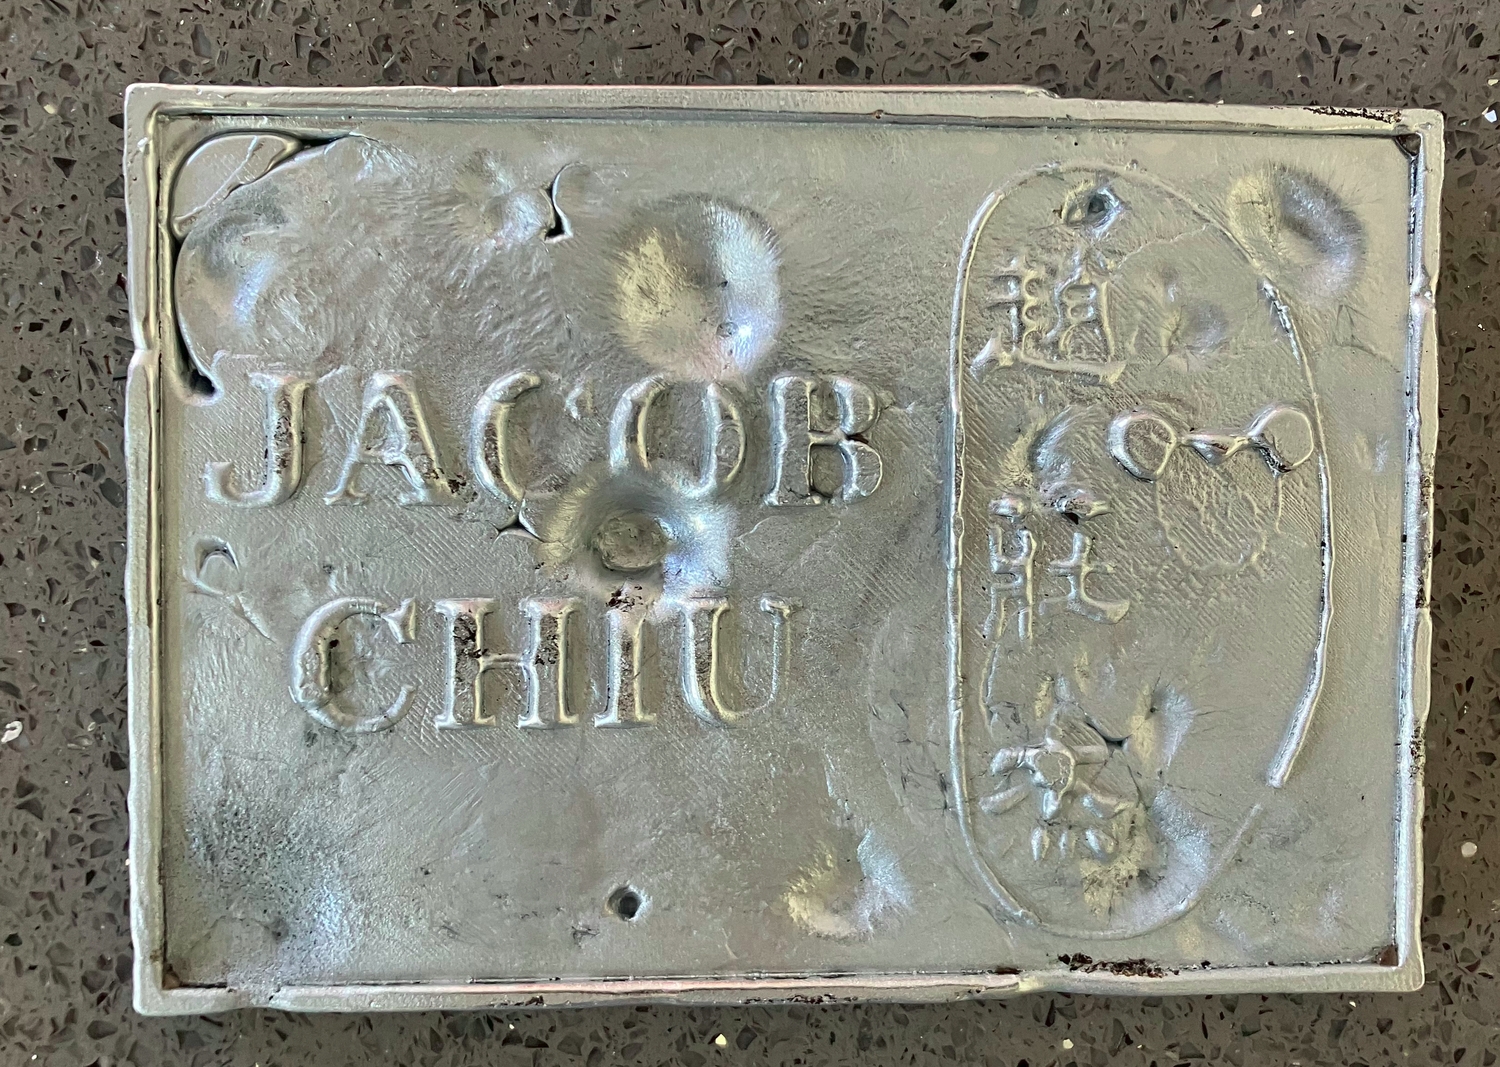
Around the end of last school year, I had a lot of spare time so I tried my hand at zinc casting. My goal was to cast a sign for my room that had my name and a drawing on it. First, to obtain some ingots, I melted down a bunch of pennies. This was probably not a good idea as pennies aren’t meant to be cast, but whatever. As a mold, I drilled a large hole in a piece of pine wood and poured the zinc in. The wood was a bit burnt, but the ingots came out fine.
Clay Casting
The first thing I tried was clay casting. Here in Palo Alto, we have soil with a very high clay content, so much so that adding sand and oil to plain dirt is enough to make a clay-like substance that doesn’t crack when drying. I can attest that this version of clay casting more or less works for simple shapes, but not for much beyond that. The clay tends to break if you try to remove an overly complex form (like my sign, which lacked draft of any kind) from it. Also, my DIY clay was not very strong and broke very easily, and all the molds broke before I could even begin to remove the form. However, I would still like to explore this method of casting since it can produce permanent molds, unlike any of the other methods I tried.
Sand Casting
This is the most common way of DIY casting. Basically, sand is mixed with 10-30% clay and made slightly wet so it can be formed into molds. Once again, I used dirt as my “clay”. In this case, I let the clay dry and ground it up before mixing it into the sand while dry. (Trying to mix a lump of wet clay into a lot of sand would be extremely inefficient.) Then, water was carefully added until the clay-sand would hold its shape. I’m sure this sand would have worked on an easier mold, but once again, my draft-less sign failed to release properly. The sign actually did release from the sand but also ripped the fine details out in the process.
Plaster Casting
Lost-wax casting is a common way of casting complex shapes. Basically, plaster is poured around a wax form, the wax is melted out, and metal is poured in. Though many metals require a special high-temperature plaster, Plaster of Paris works fine on a low-temperature one such as zinc, and instead of a wax form, you can use a 3D printed form. After adding too much water and making the plaster weak, accidentally warping the PLA form in a dehydrator and ripping it out of the mold, and making an overly thin mold that cracked, I was finally able to get plaster mold and place it upside-down underneath a campfire to burn the PLA out. This worked well, leaving a bit of ash that could be mouth-blown out. However, when pouring the zinc in, bubbles started appearing, probably because the plaster absorbed water overnight. In addition, the lack of head pressure (I poured the metal directly into an open mold, whereas most castings are made in enclosed molds and the height of the metal is above the level of the casting to build up liquid pressure to fill fine details in) caused all of the detail to be lost.
Conclusion
In the future, I will probably experiment a bit using a less complex and easier-to-cast form before doing anything else. If I were to try and cast this sign again, I might consider embedding a plaster mold inside some sand so that I can use common sand-casting techniques like risers, vents, etc. to improve the quality of the casting while getting the detail of a plaster mold.
4 responses to “Failed Attempts at Zinc Casting”
[…] been trying to refine my backyard soil into some workable clay in order to further my metal casting project. As you can imagine, this comes with some challenges as not all clay, even when purified, is […]
[…] my attempt to cast zinc, I simply mixed dirt with enough sand to prevent cracking and formed it into very simple molds that […]
[…] additives), to fuel his Coleman 442 pressure stove. After using it for a few camping trips and to melt zinc, the fuel was finally finished as I continued my metal-casting project over this summer […]
[…] My previous attempt at casting focused on casting a detailed model with no draft, necessitating the time-consuming investment casting process. However, for simpler and properly drafted models, more rapid castings can be obtained with sand casting, though with a poorer surface quality. […]